So, if you’ve been following my Twitter you might have noticed I’ve been working on a costume for the last couple months. It’s not actually 100% complete and I’m not totally happy with it, but I wanted to do a writeup on some of the stuff I did with it and what worked/didn’t.
Anyway, I guess I should start by outlining some of the more “interesting” things I attempted with this costume. I don’t end up making stuff all that often so usually when I do make a costume part of the motivation for me is to try out interesting techniques to solve “problems” with a design. 2B interested me because, well I like the character and her outfit is pretty nifty, but also if you look at the design closely it has a lot of unusually practical design elements (for example her game model features––actually practical––darts on the bodice of her dress) and presented some interesting challenges as a costume (like the blindfold).
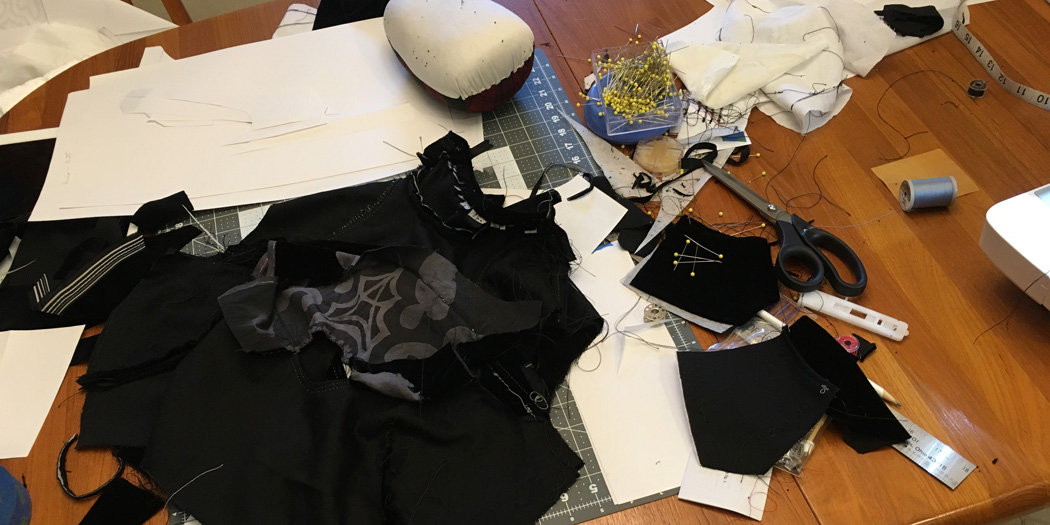
While not something particularly unique to this costume, I used the opportunity to try out digital patterns for the first time to use as a base (out of equal parts laziness and mostly working on it in the wee hours of the morning when stores are closed and because I needed to do a fair bit of vector work anyway for some of the costume’s elements). One of the more useful things I discovered is that Burda’s digital patterns don’t have any kind of protection on the PDFs, in fact you can open them in Illustrator and extract all the paths and edit them directly. So I took advantage and drafted some things from scratch (the skirt and part of the bodysuit) in Illustrator and used some commercial digital patterns as a base for others (the bodice and a different part of the bodysuit).
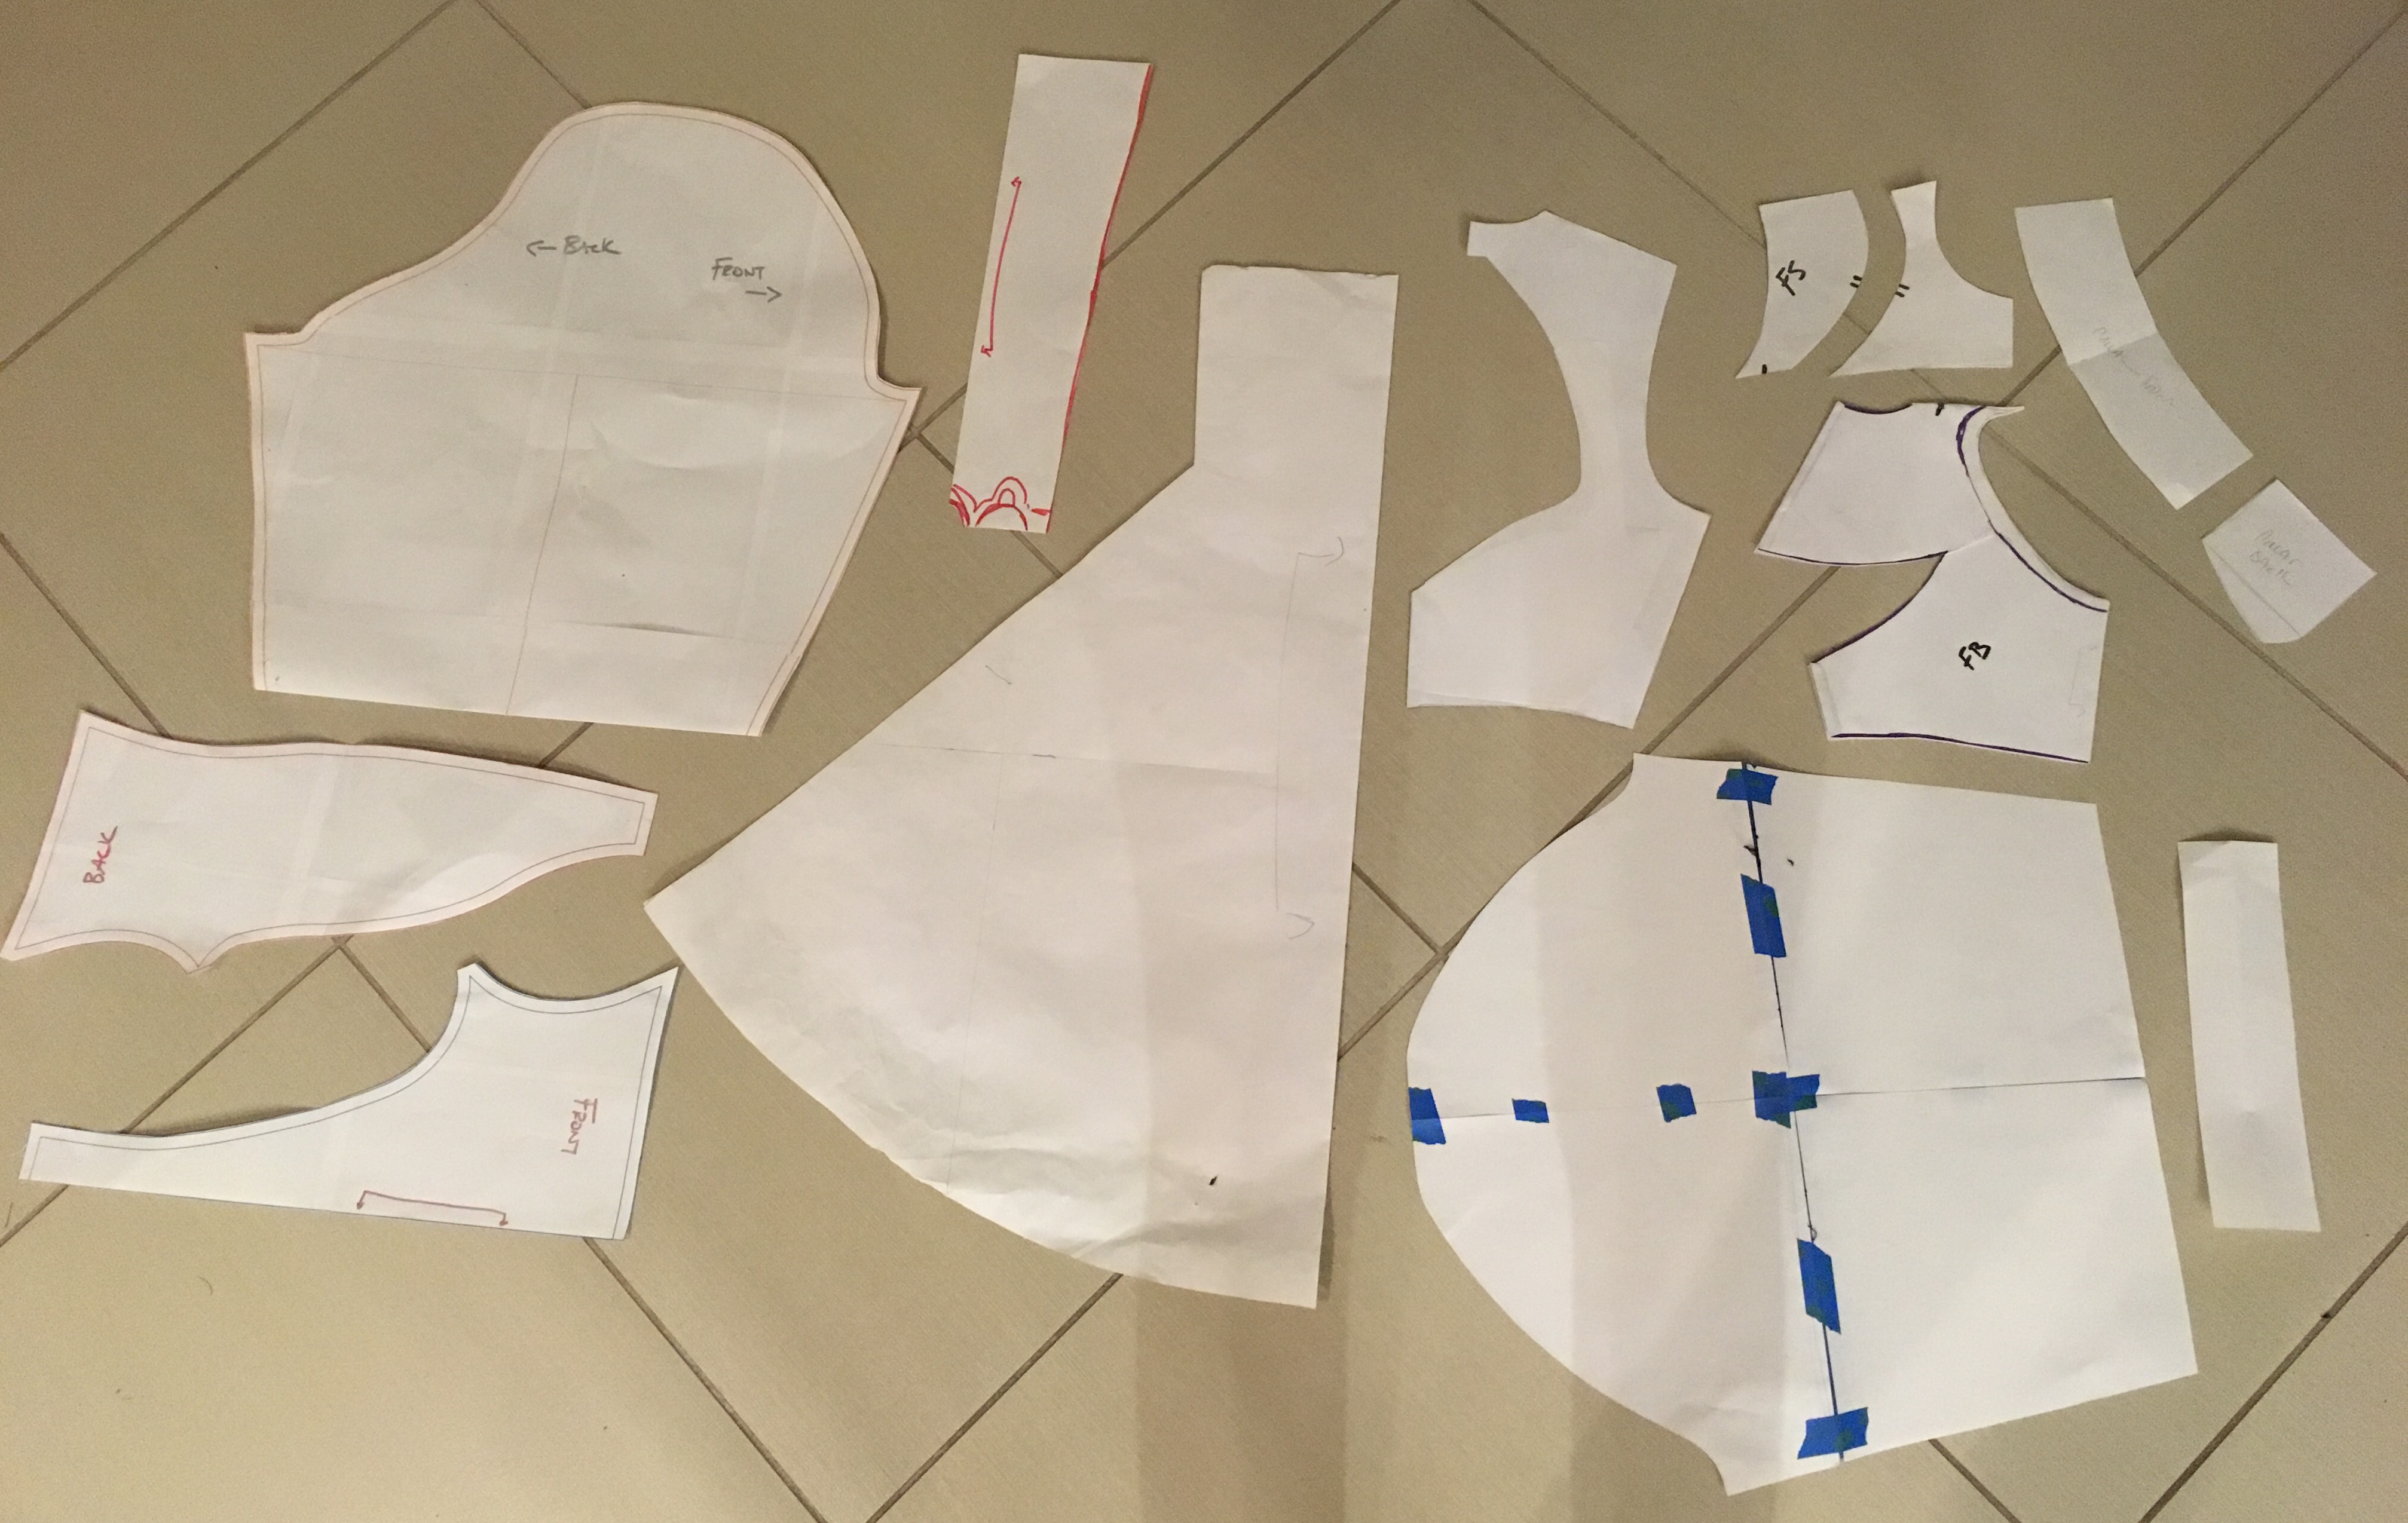
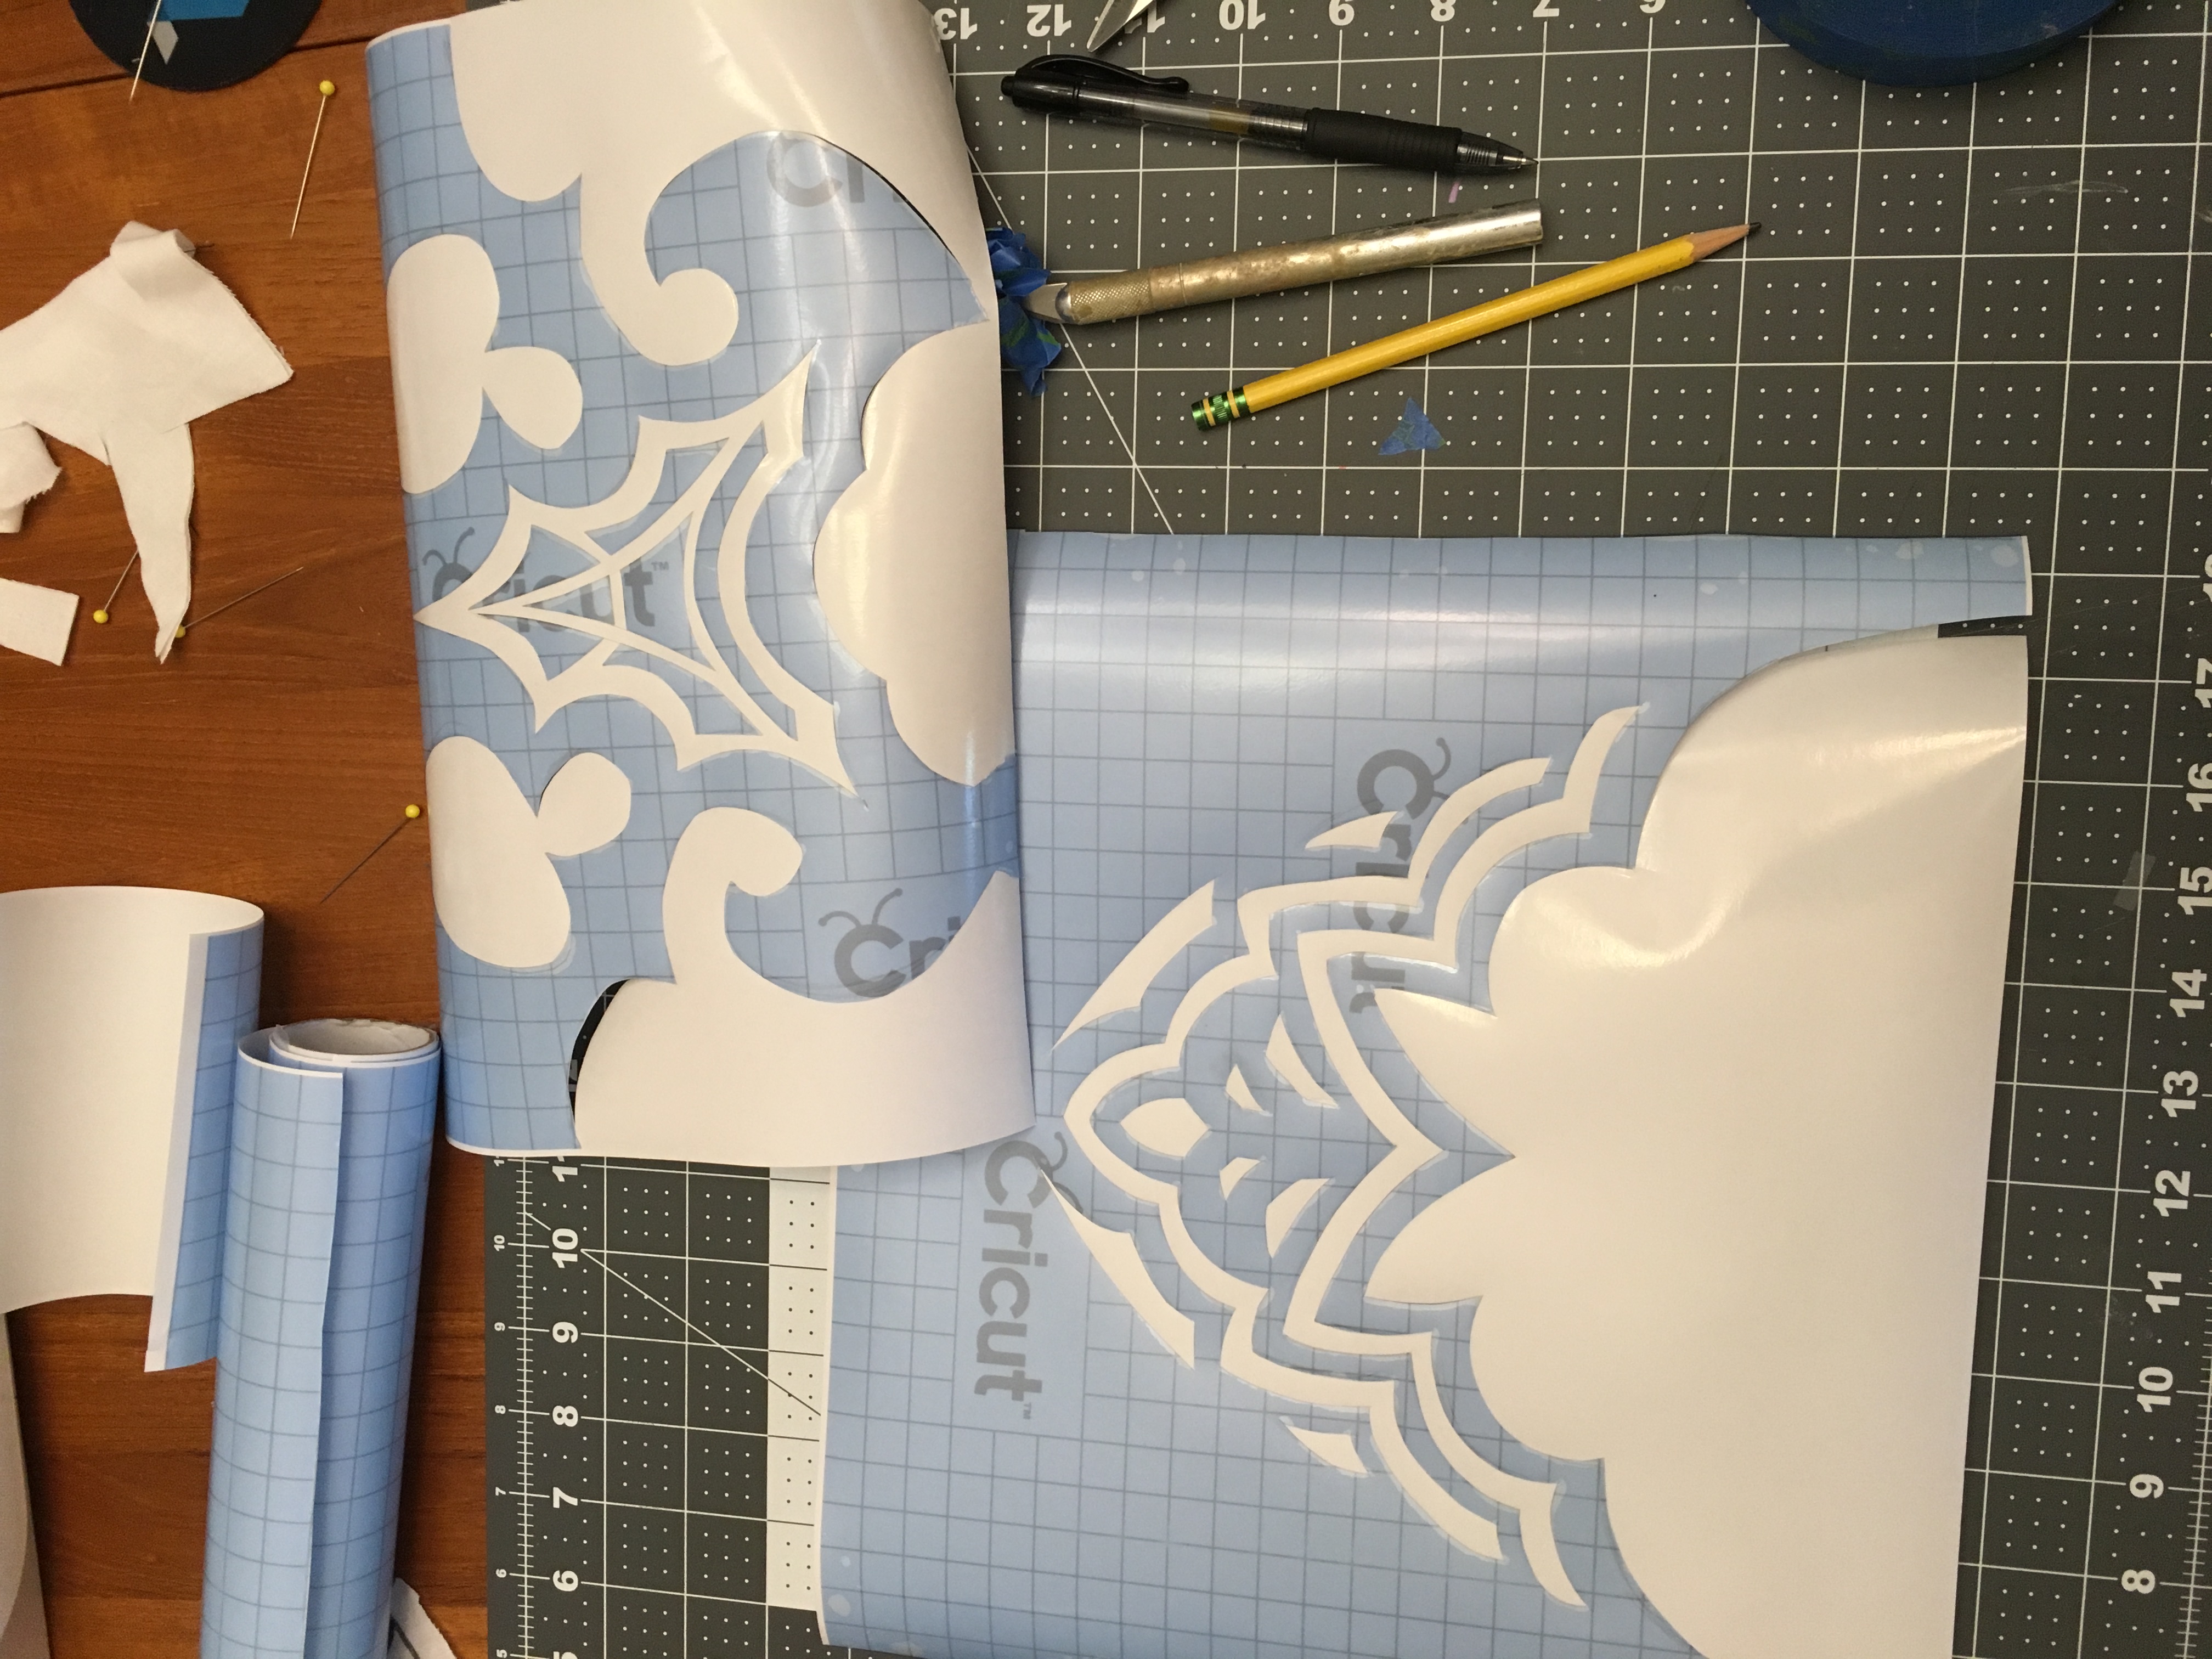
Anyway, if you have Illustrator or another vector drawing/editing program, I’d recommend giving it a shot sometime. You can make really precise adjustments to pattern lines in a non-destructive way, keeping your master precise and clean so you can always just print off another copy (or if you’re being a weirdo like me you can even scan your modifications back in and make adjustments to the pattern). I thought it was pretty useful even though I still suck pretty hard at flat pattern drafting and modification. It was especially useful in terms of scaling the patterns “lace” inserts and getting the right curve on the border embroidery pattern. Piecing the printouts together was a bit of a pain in the ass sometimes, but not nearly as bad as I’d assumed. Even taped together printer paper’s honestly a lot nicer than that shitty tissue paper commercial patterns are printed on. I’d post the final results of my pattern shenanigans but I haven’t transferred all the final corrections yet, some of it is based on a paid pattern and it’s sized, well, for me not a standard size so it’d probably be of limited utility to most people. Here’s a shot of what the final pieces ended up looking like though:
Here are some SVGs of the traced patterns in case anyone might find them useful. A friend pulled the texture off the model to trace directly from so the front and back sections should be pretty accurate and the skirt part was traced off the officially released one, the “loose” ends near the butterflies are a little simplified but, again, should be a good starting point if you want to save some time––do note that if you want to use the skirt pattern you’ll have to warp it yourself to the size of your skirt and what scale you want it to be.
So as far as project-specific challenges I found “interesting” ways to tackle, I guess I started off with the blindfold so might as well start there. The blindfold presents a few different practical issues, the obvious one being how are you going to see with it on (or put it on/take it off easily if you can’t see out of it) and then the not so obvious issues like getting it to maintain the right contours and generally be easier to wear.
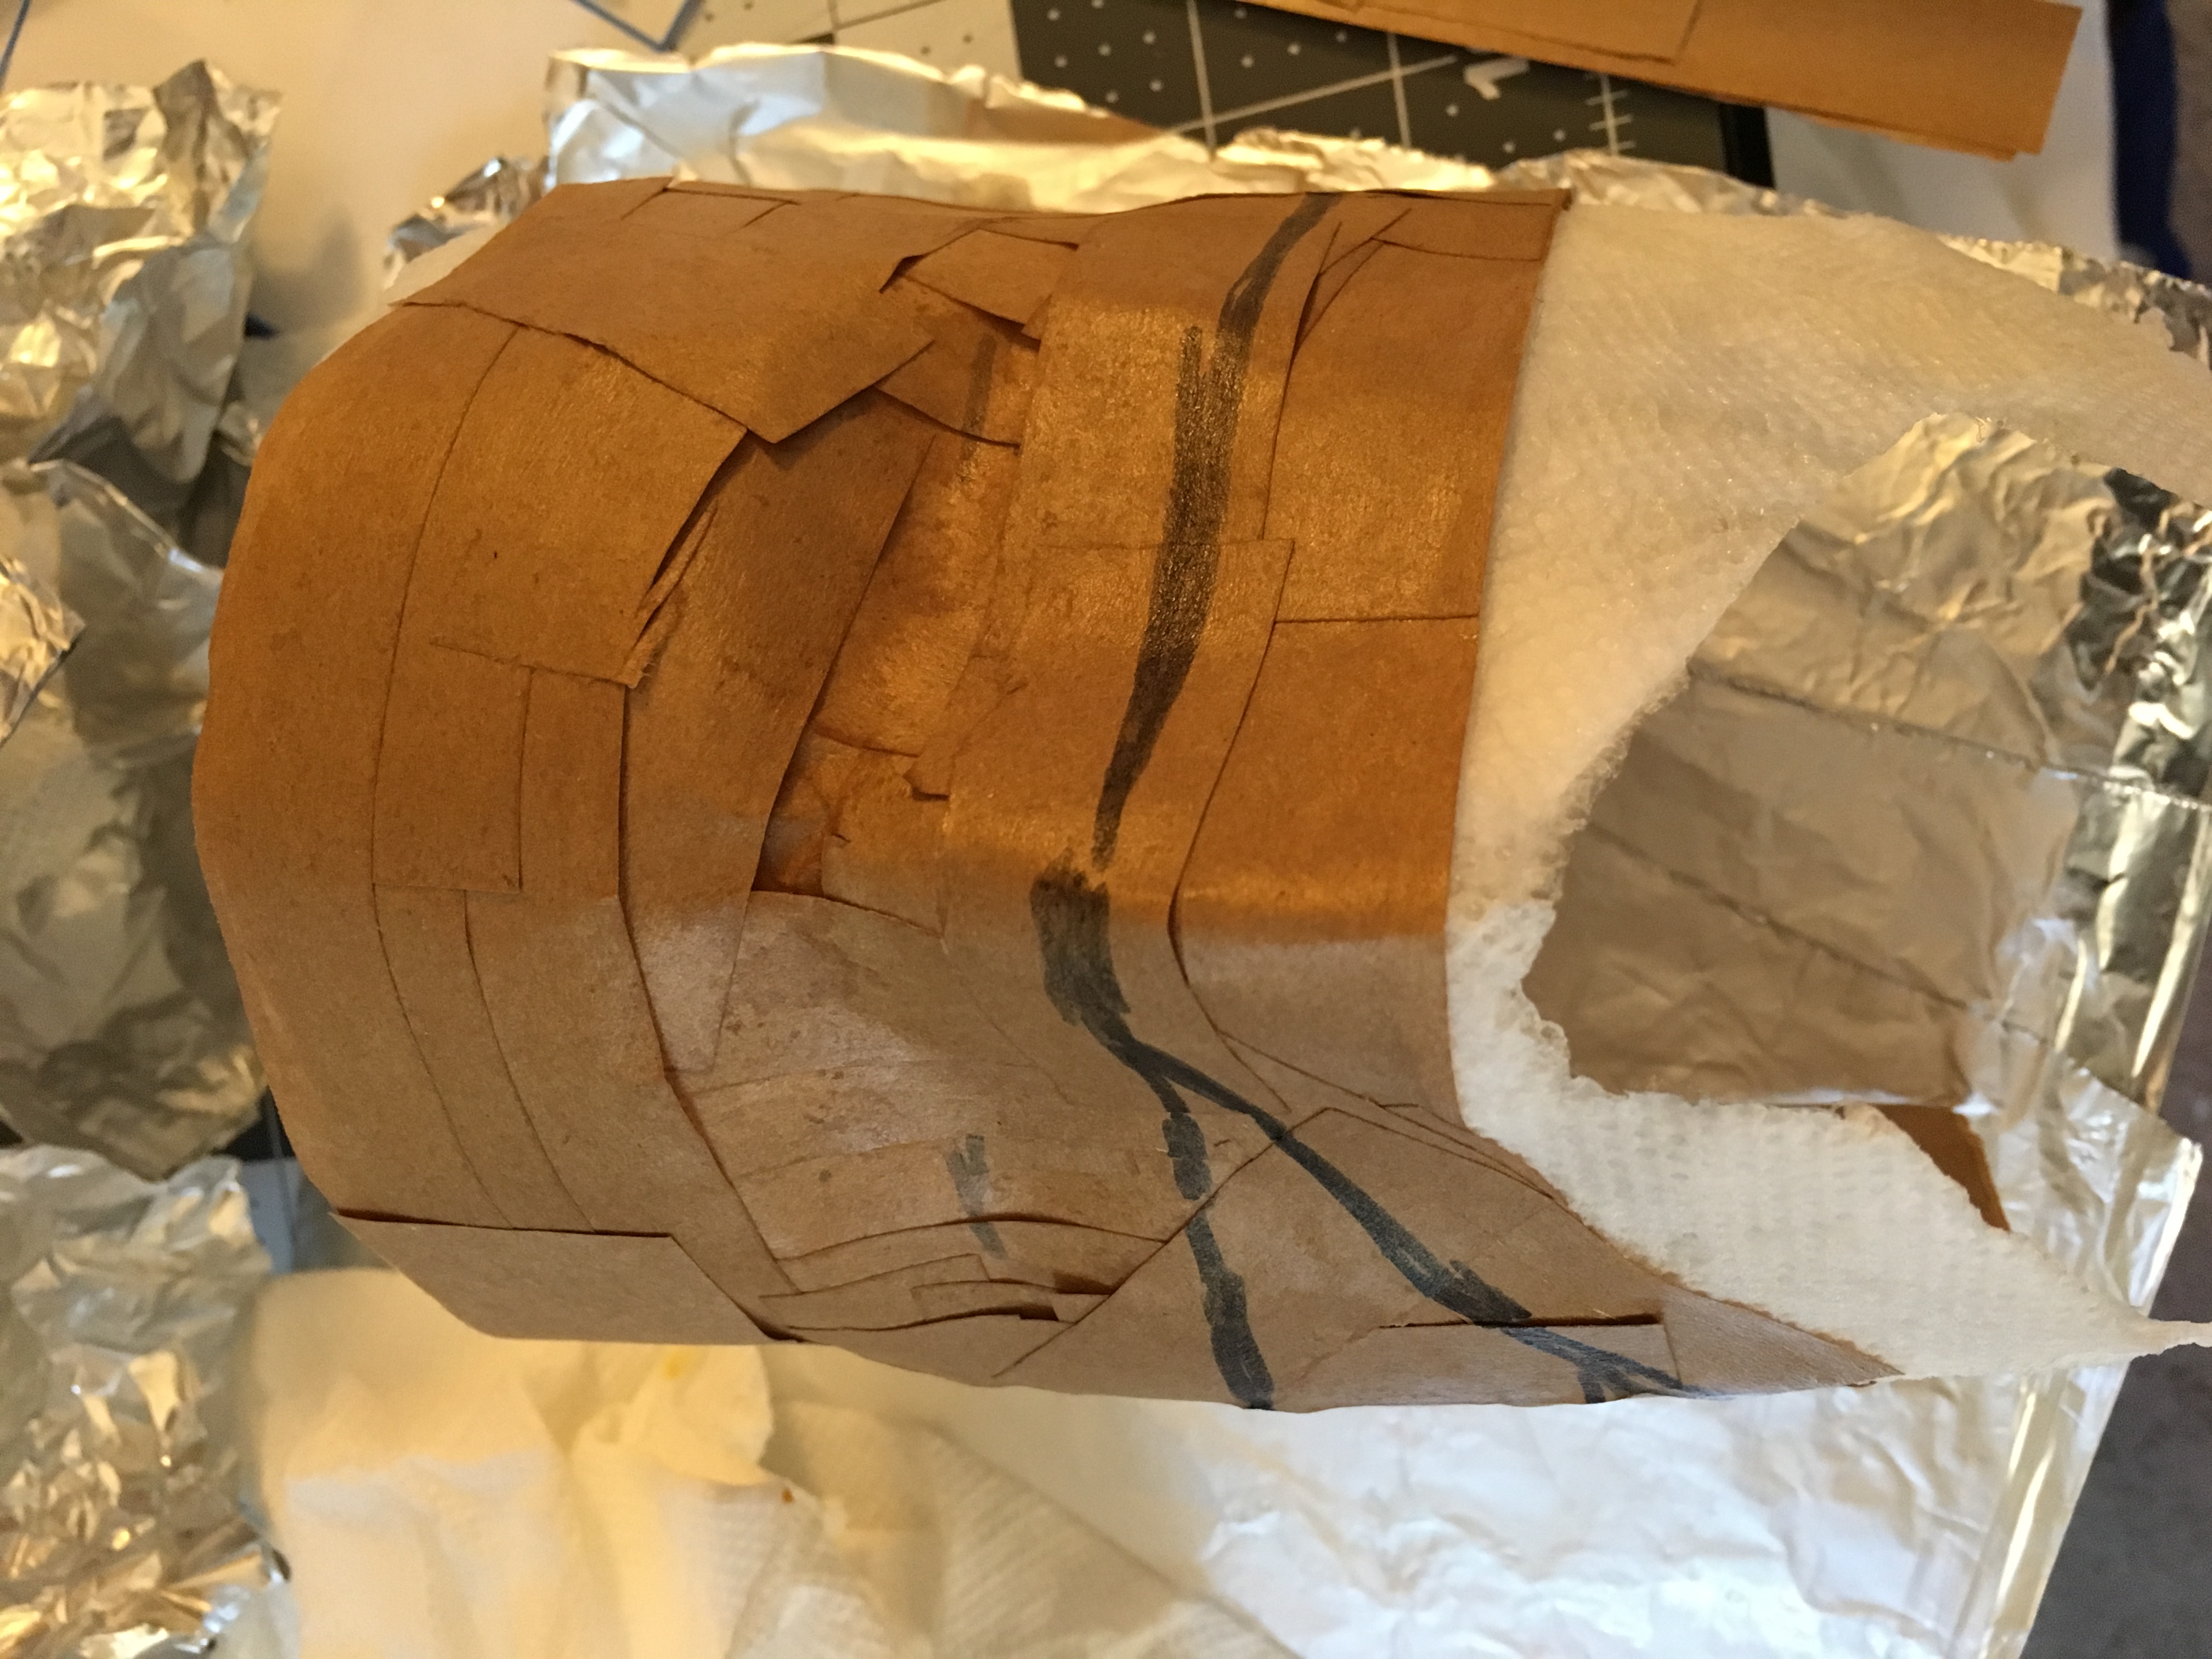
My approach was to forget about working with fabric at all and instead make a rigid mask that just looks like fabric. This way I’d be able to make it keep its shape easily and (theoretically at least) be able to pop it on and off much more easily than a fabric blindfold. Most of the edges of the blindfold on 2B at least are covered neatly by her hair, so my plan was to make it snap into the wig on the sides.
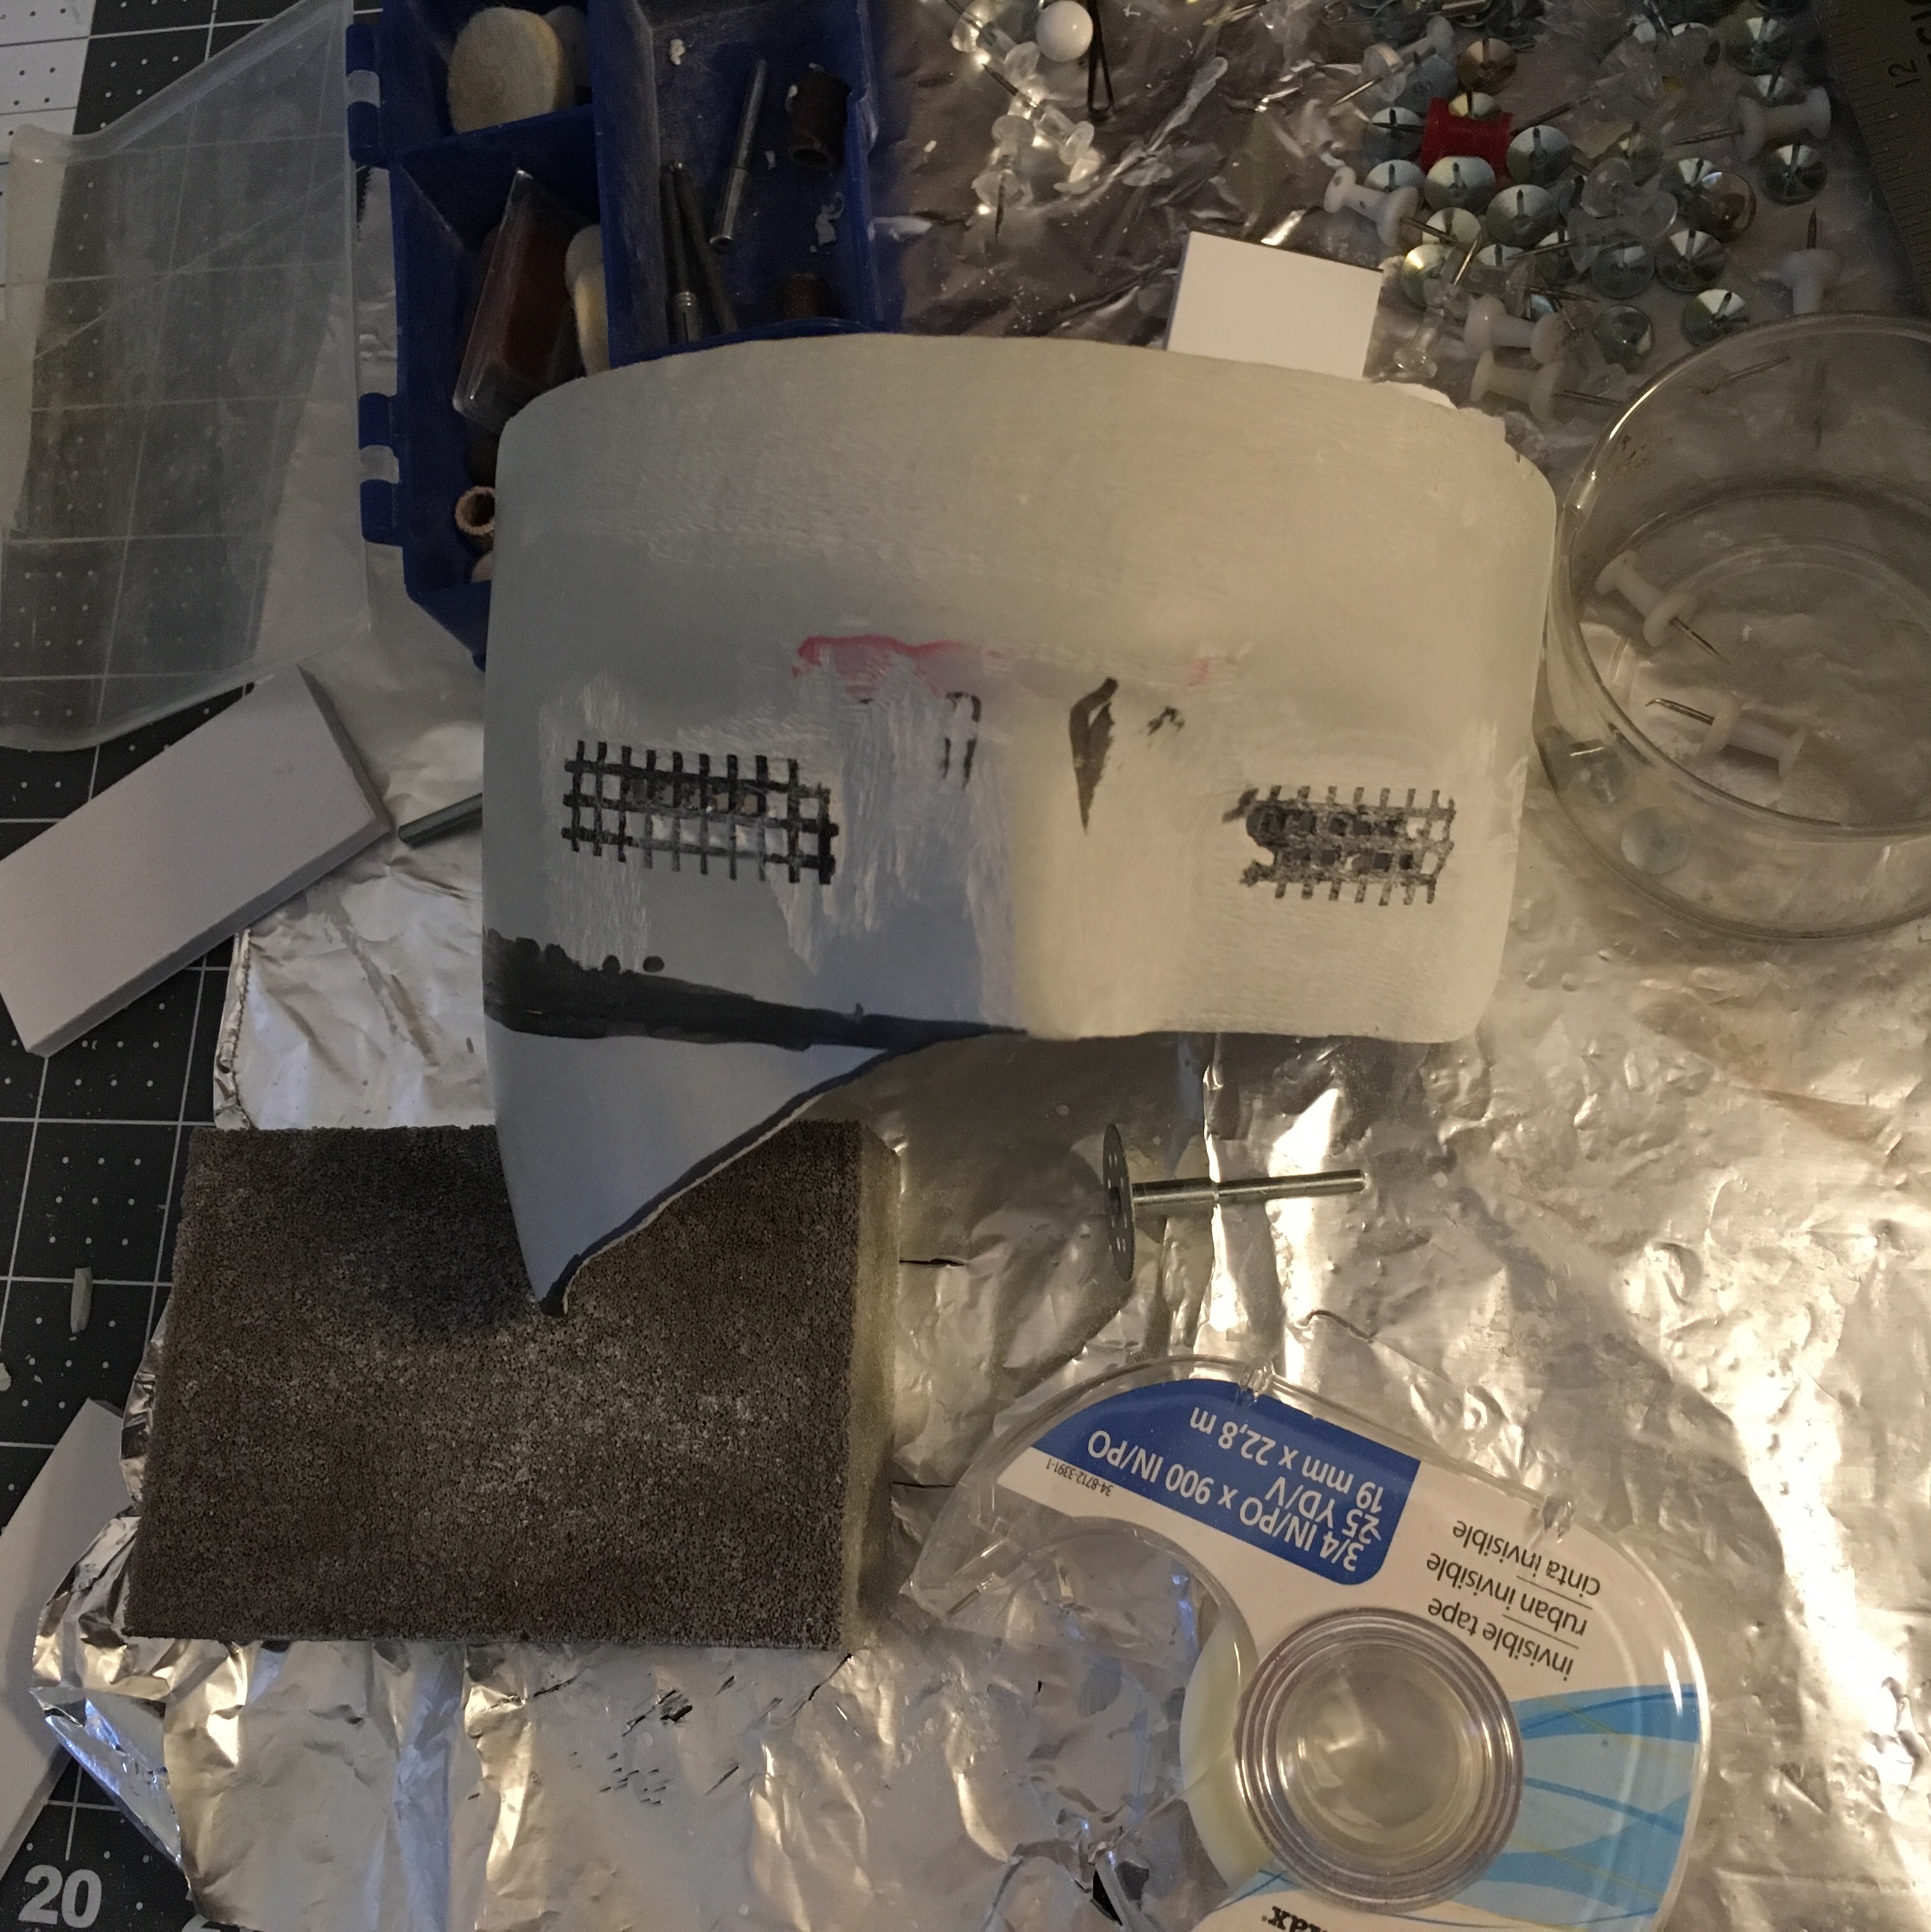
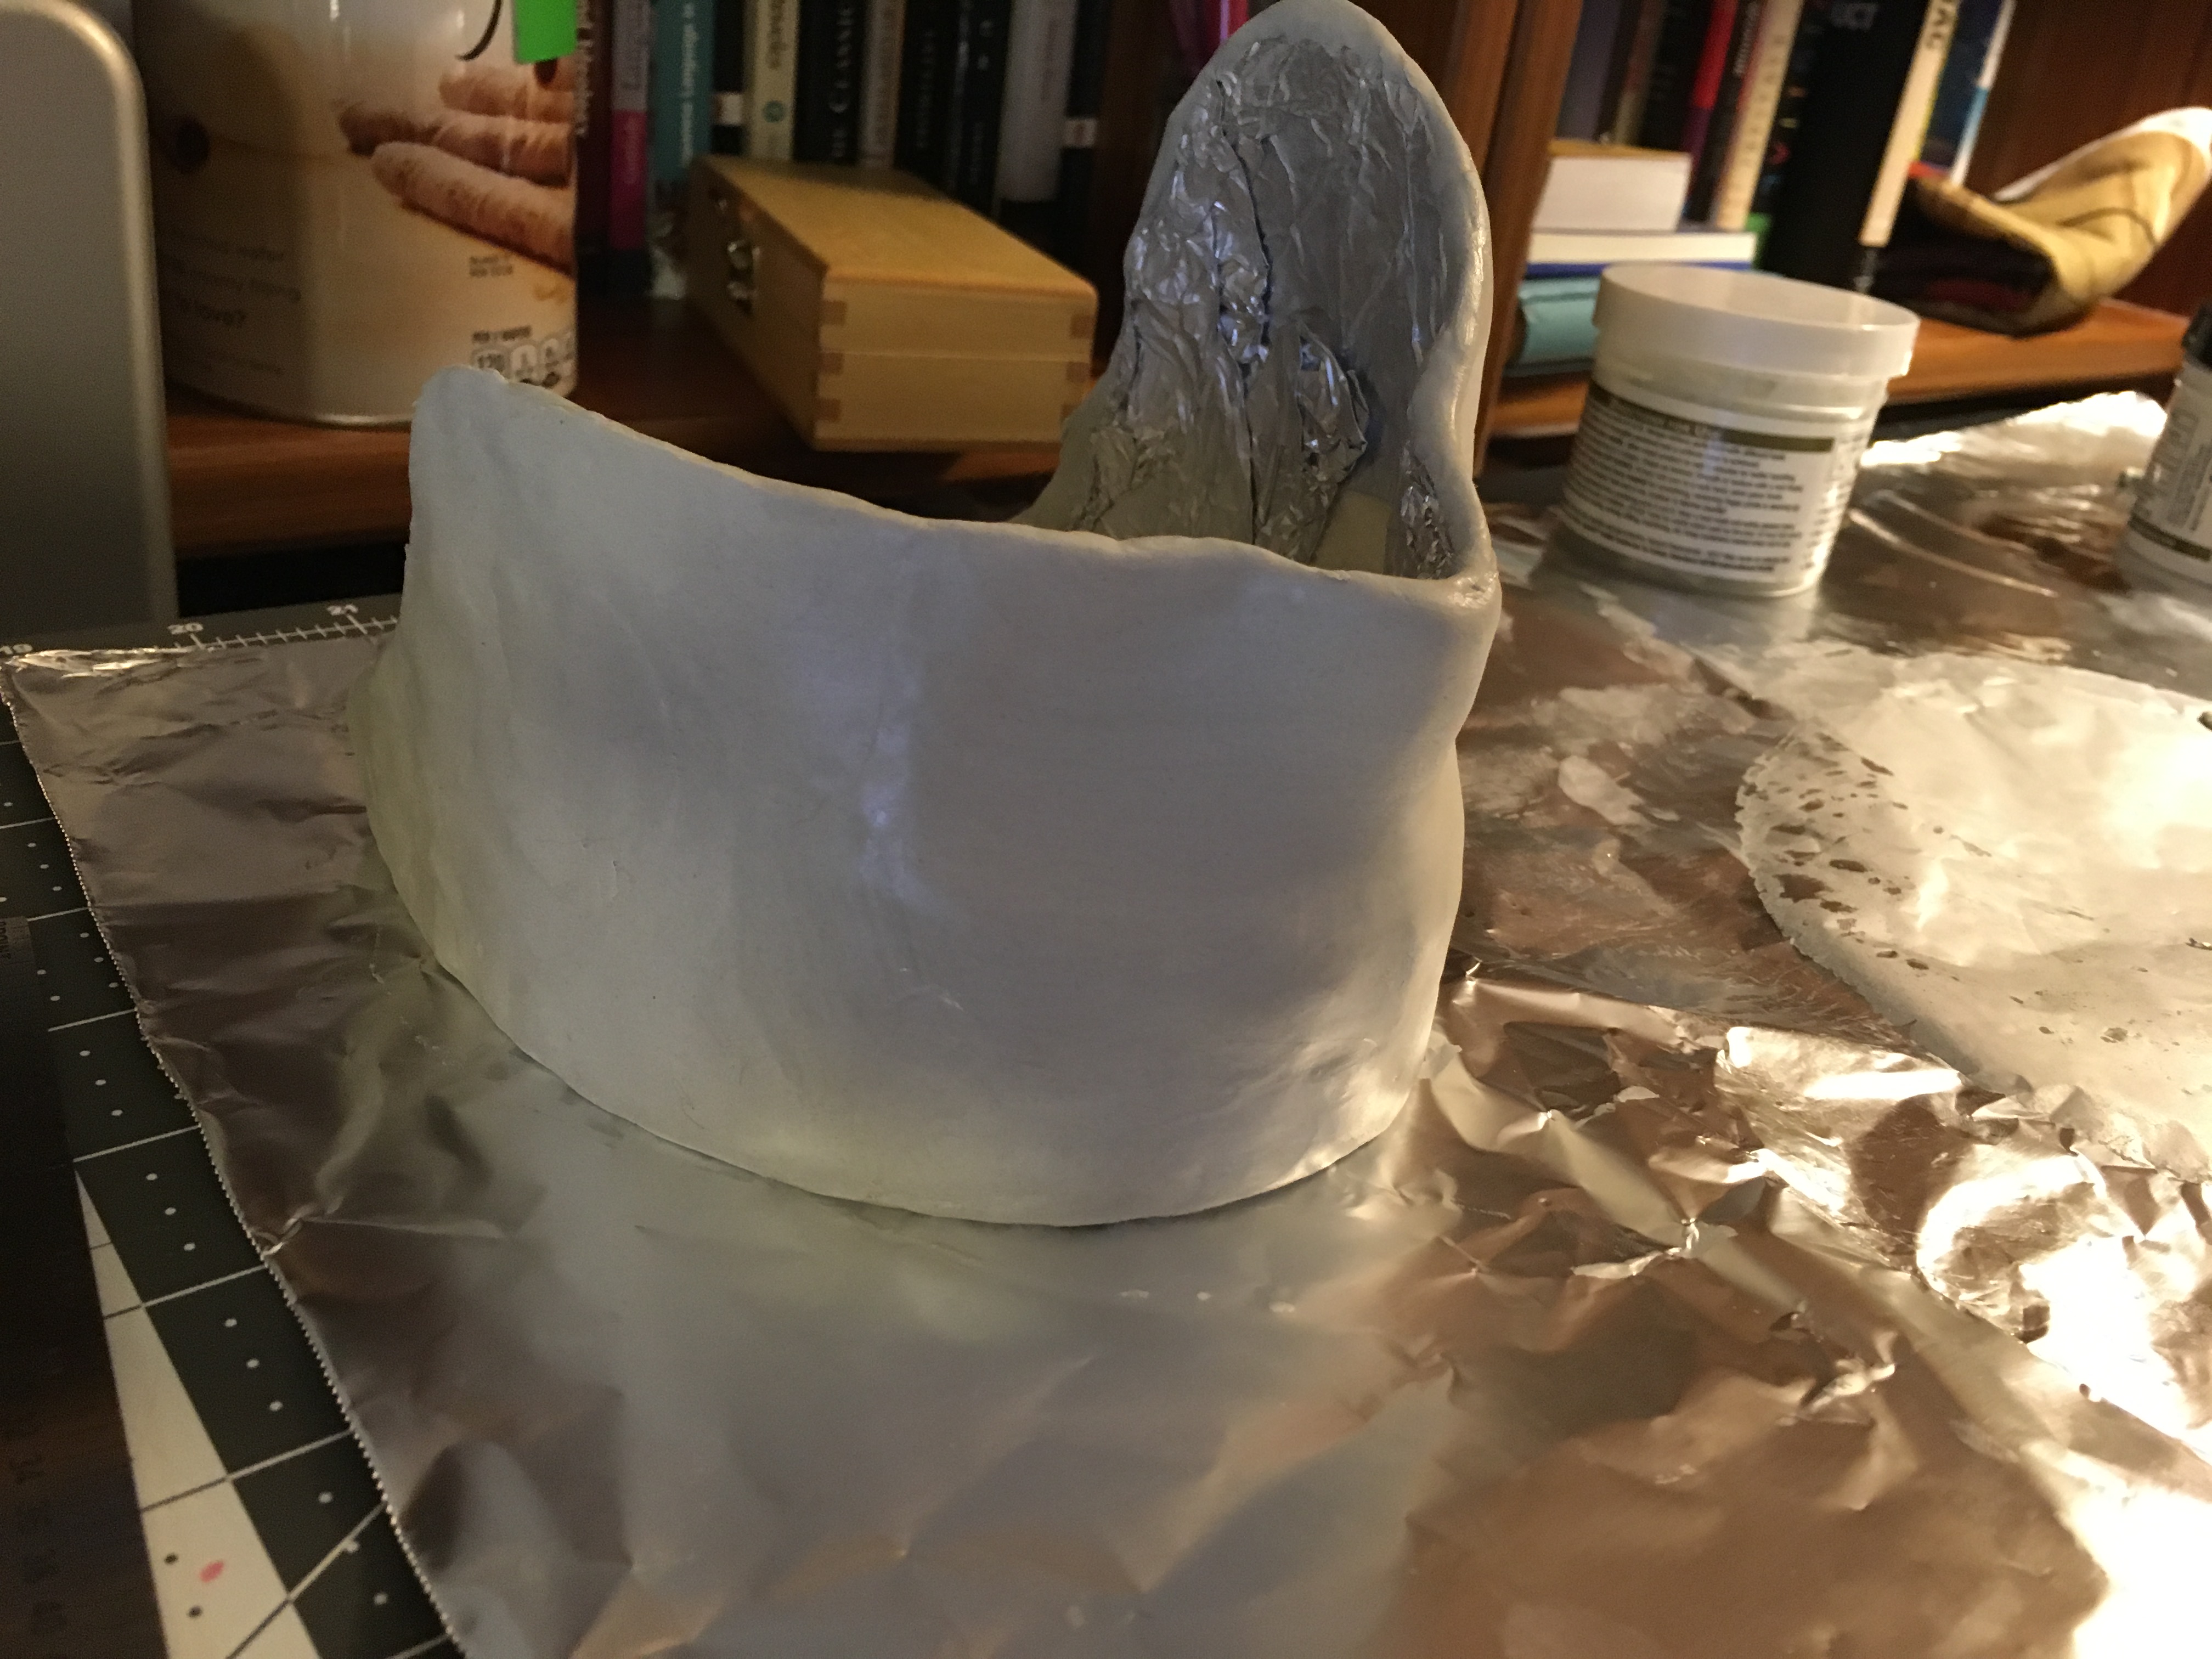
This was made a bit easier by the fabric choice in the design––it’s supposed to be velvet and replicating that texture on a rigid surface is actually pretty easy compared to some other fabrics. I started off making a shitty aluminum foil and paper mache mold of my face and then covered it with a very thin layer of Apoxie Sculpt, ultimately removing the original “mold” once it hardened. This wasn’t really the best material choice to be honest, but I had a lot of it lying around and have worked with it a lot so that’s what I went with. Any thermoplastic would probably be a much saner choice since you can more easily make adjustments to the fit and it wouldn’t be so brittle, but regardless I made it work with the Apoxie Sculpt.

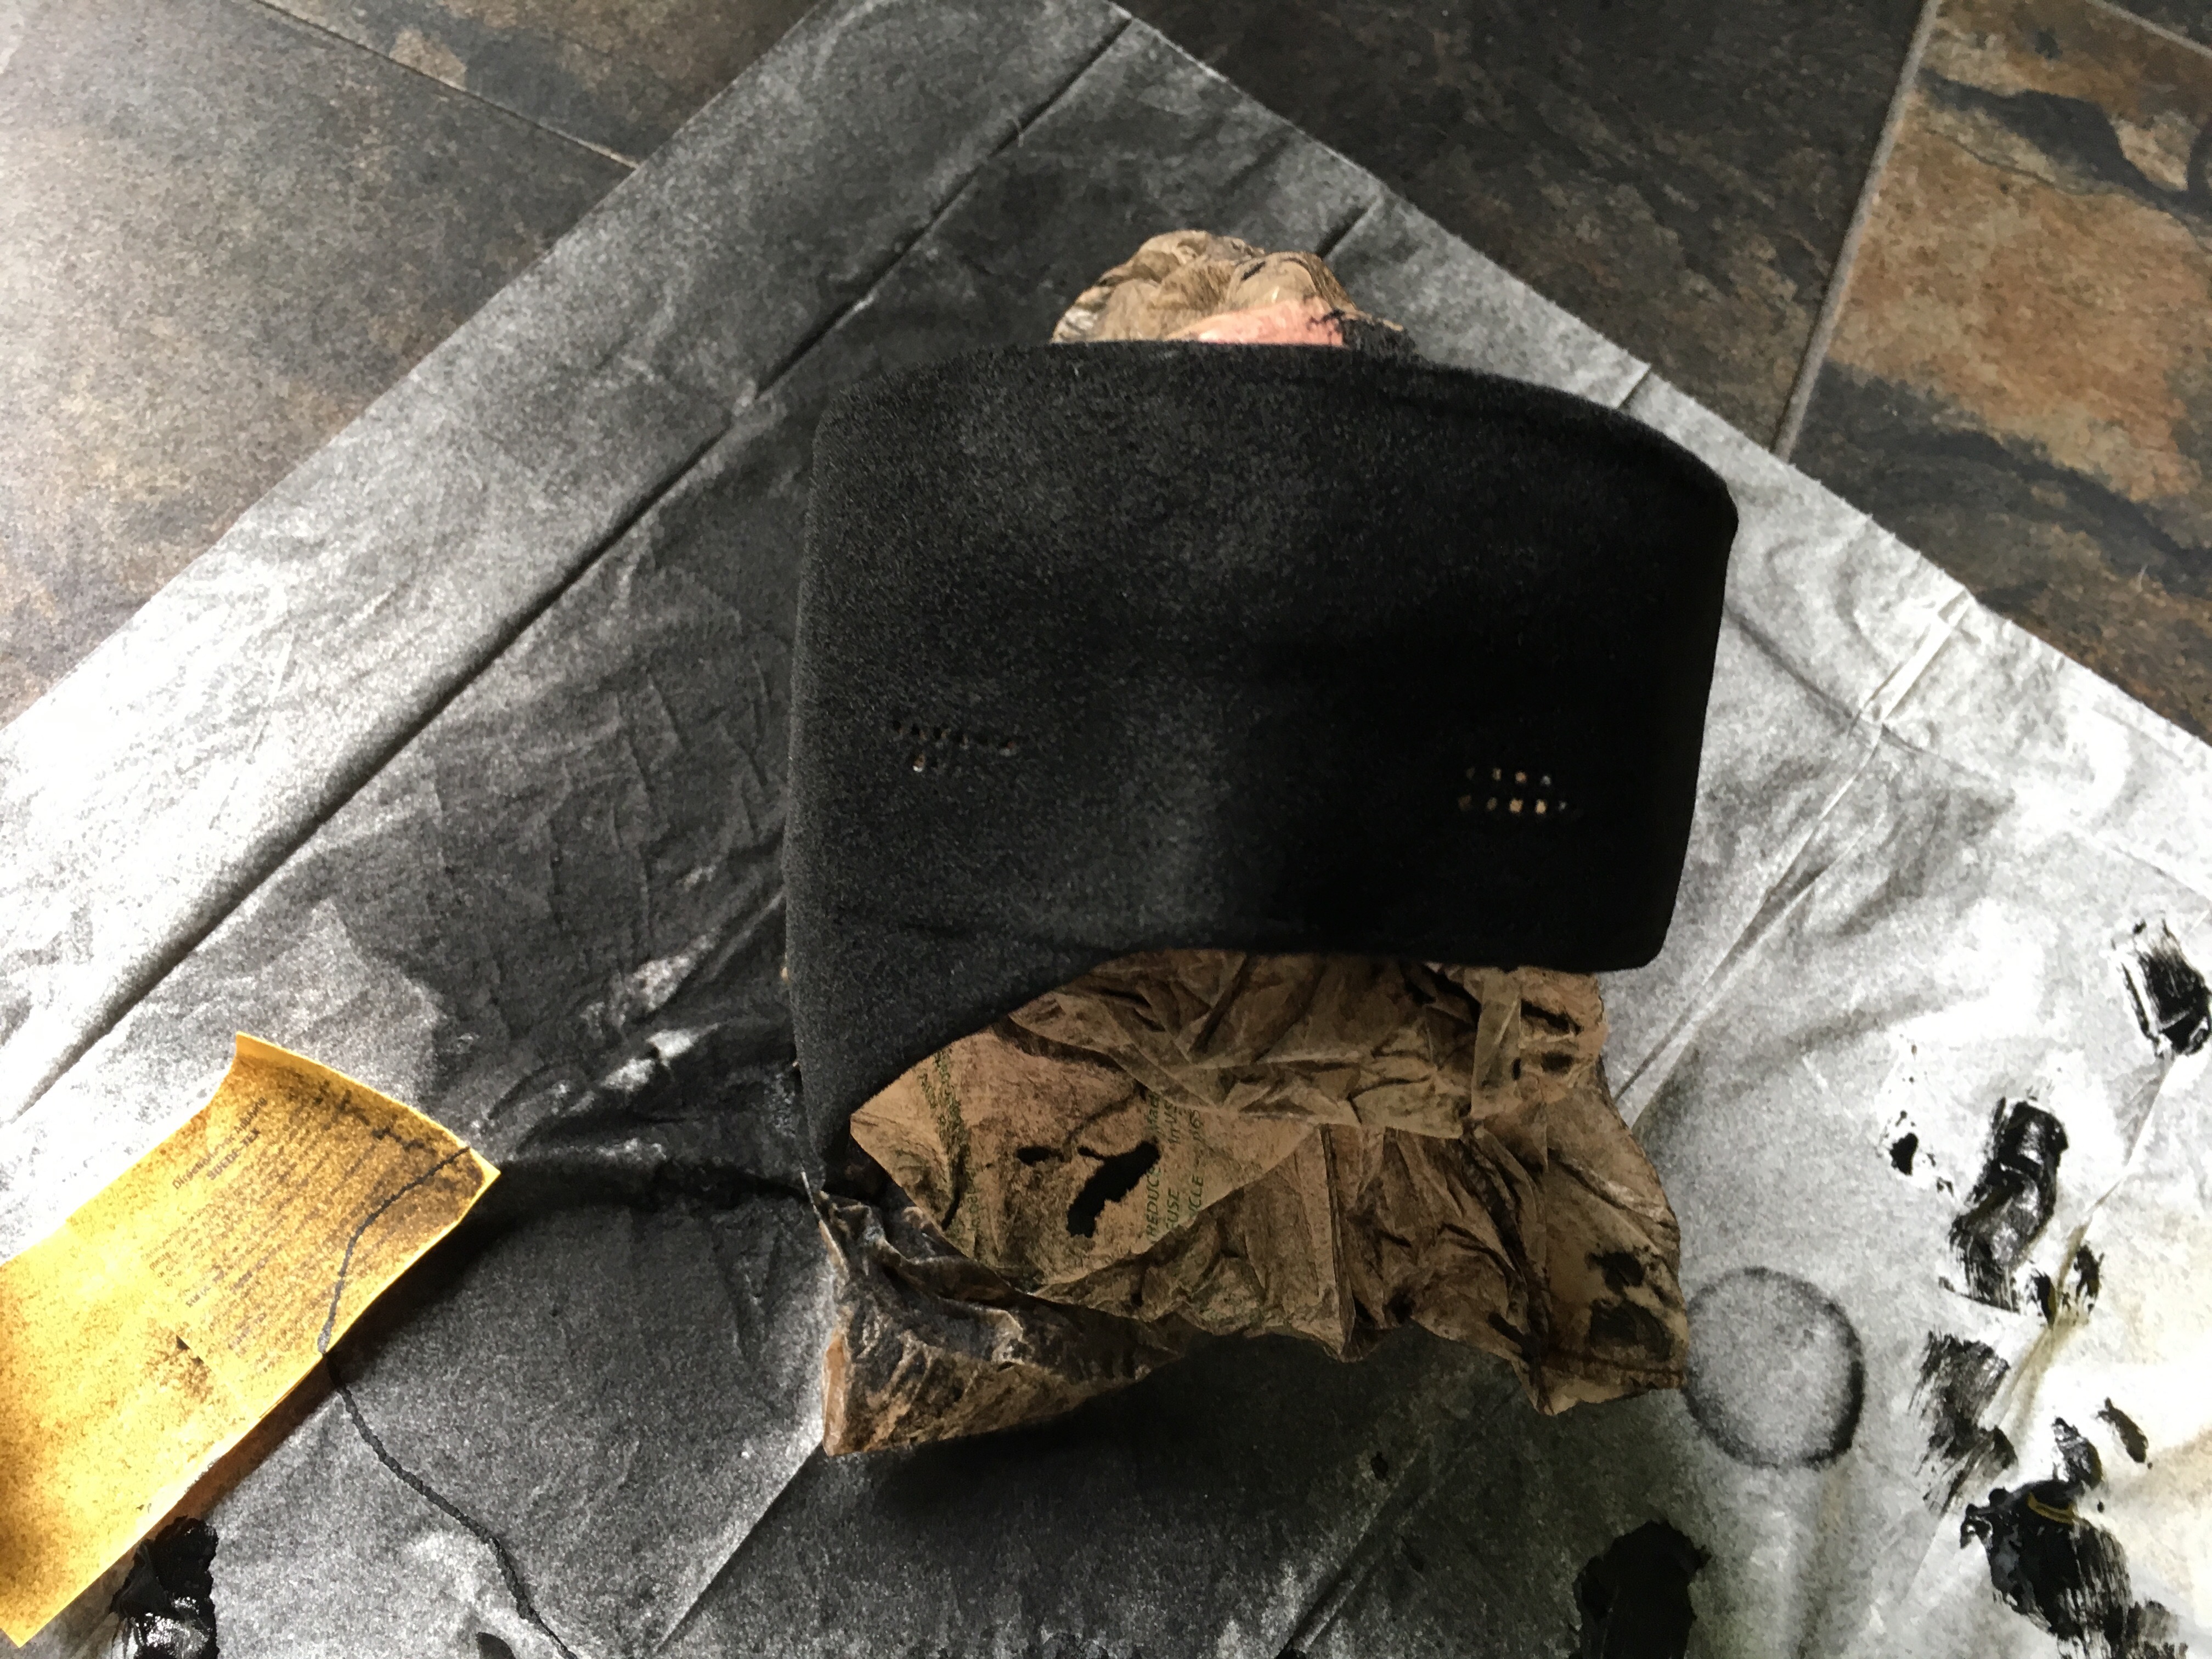
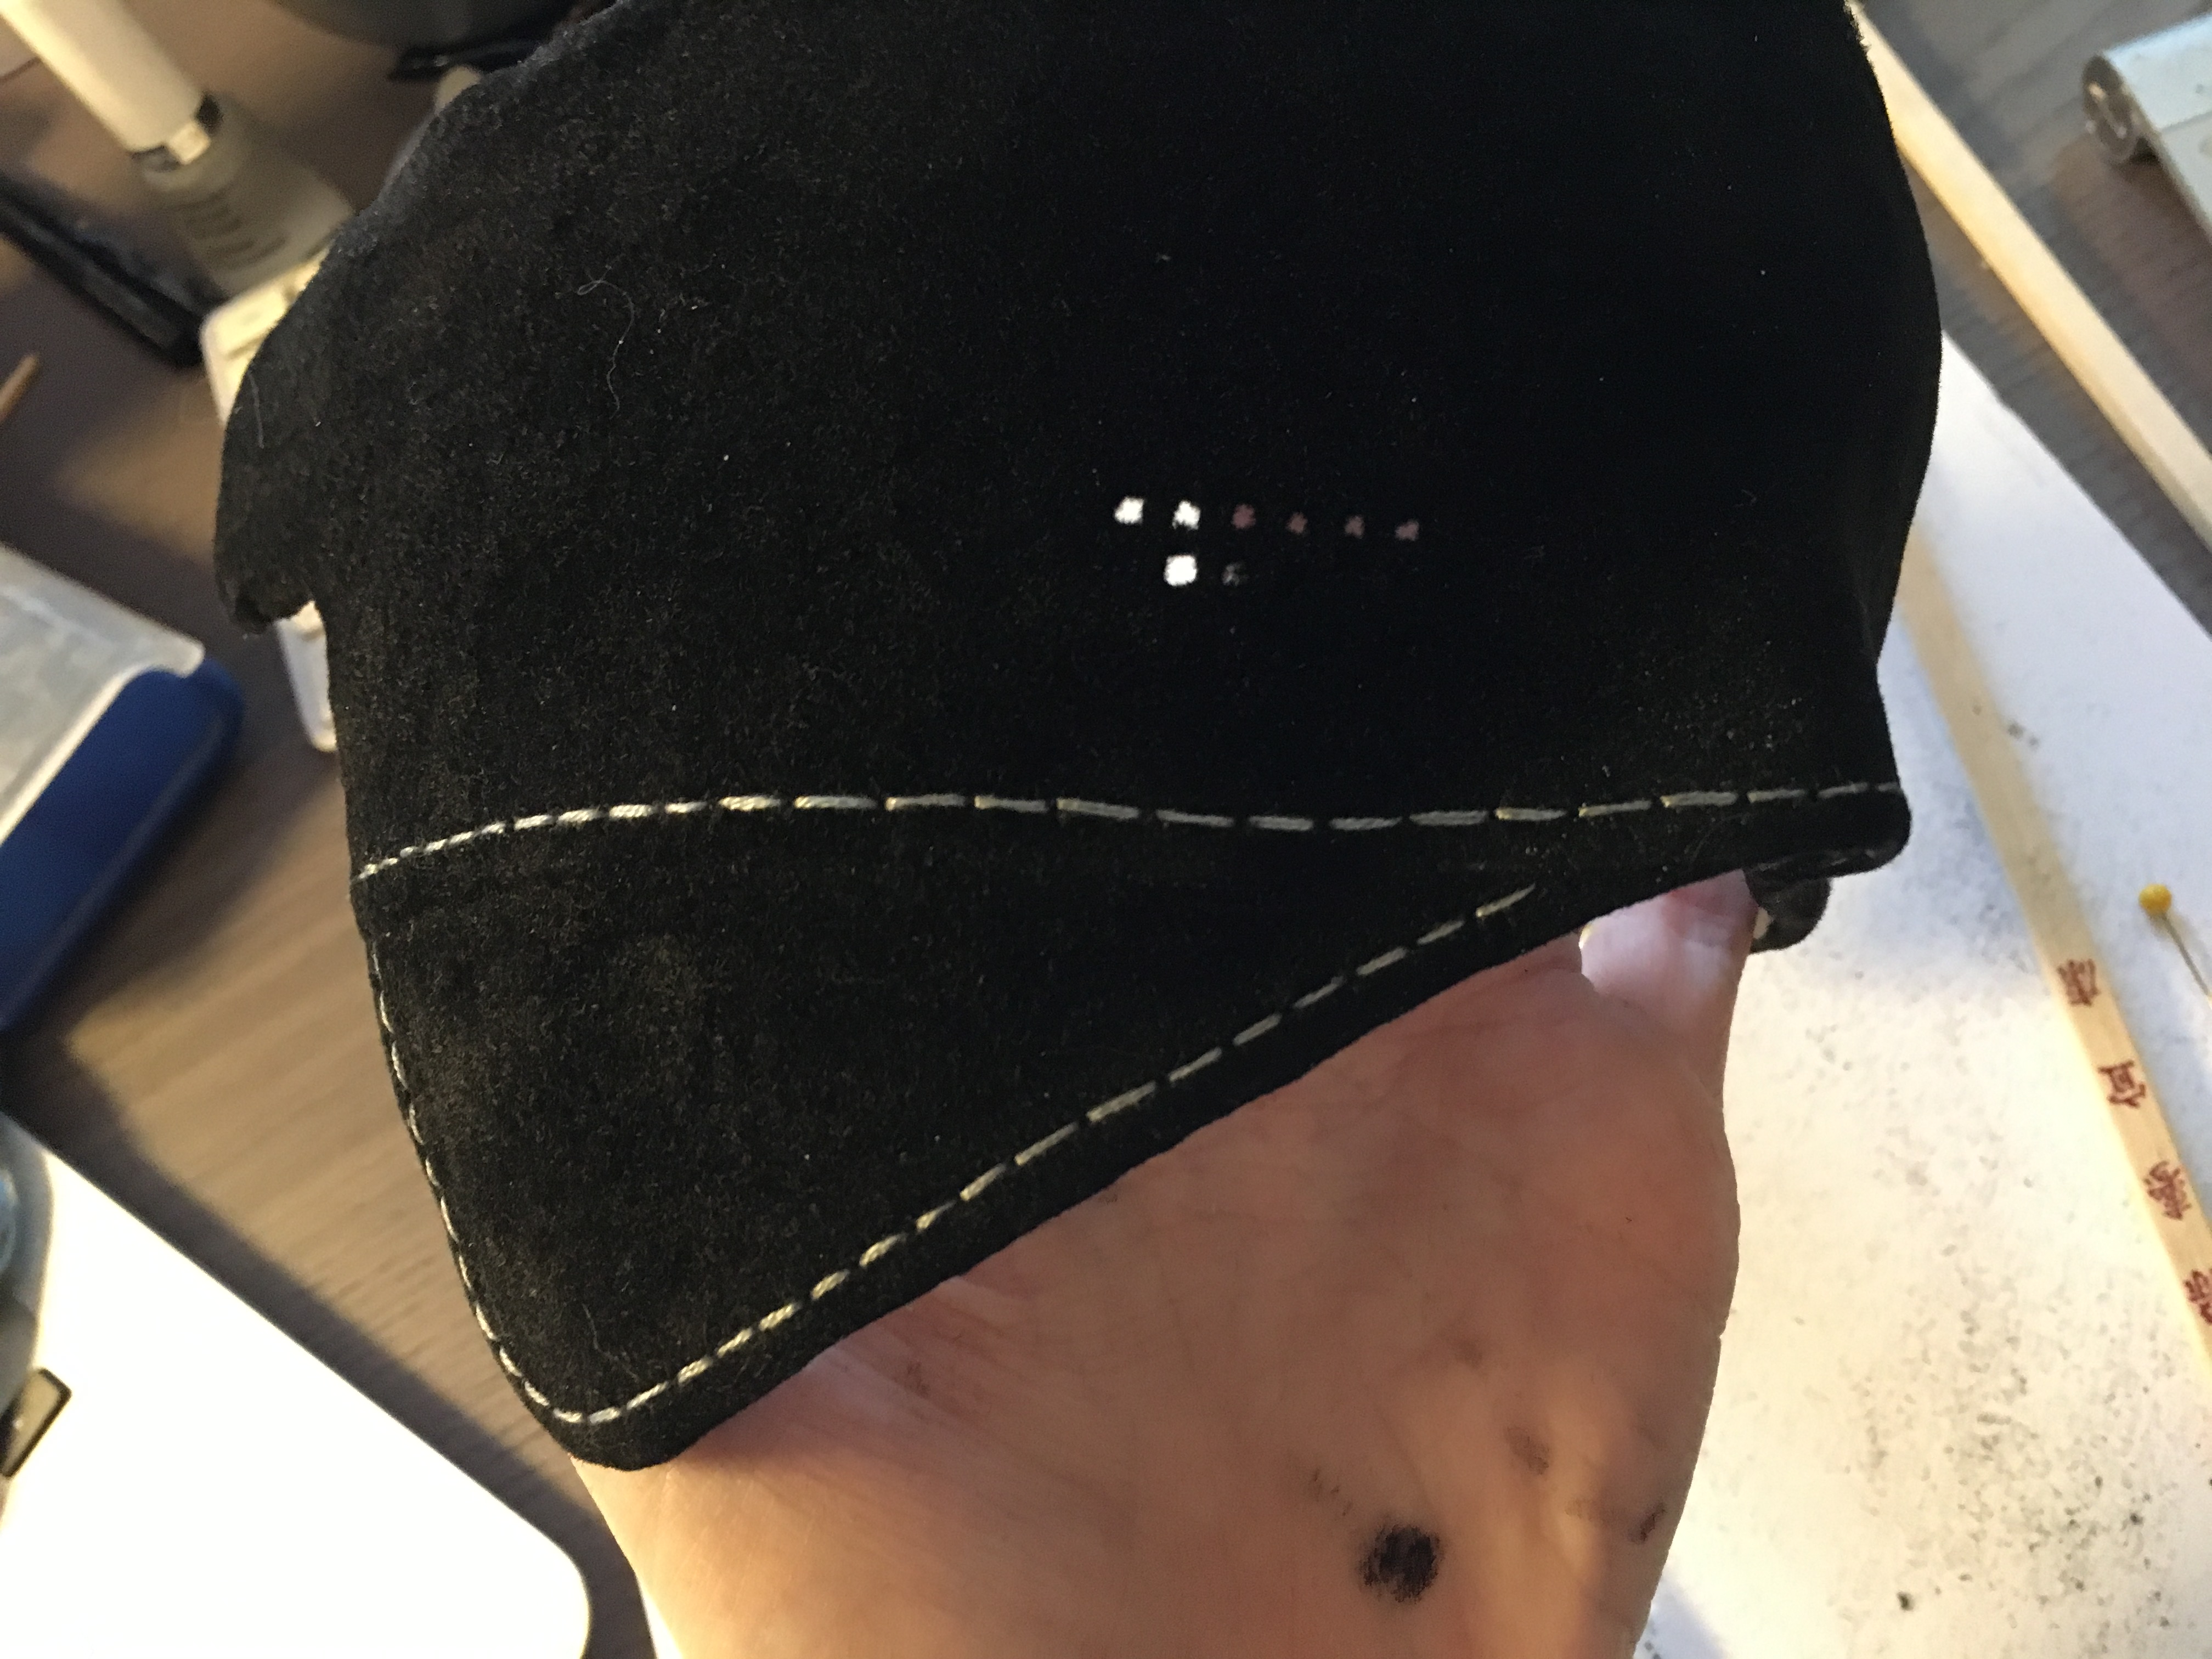
After copious sanding and adjustments to the fit (which again could have been made much simpler with a smarter material choice) I sculpted in false seams and drilled holes for the topstitching. I also used some plastic mesh for the eyeholes, though really you could probably just drill some holes and get the same effect with less work. And then the fun part: flocking! If you’re unfamiliar with the technique, it’s basically where you paint a layer of glue onto a surface and then spray it with little fibers to create a velvety surface. Jewelry boxes and things like car glove compartments use flocking pretty frequently. Anyway, basically it looks pretty damn convincingly like velvet, especially with all the fake seam work I did (my application of the glue wasn’t super perfect though and it’d probably look better if I’d done a less shit job there). Then I went back in and stitched through the pre-drilled holes with some embroidery floss and ended up with a pretty convincing “blindfold”. Despite the less than ideal material choice, I think this was one of my more successful experiments.

The next thing I worked on was the bodysuit. From the start I’d decided that, well, I don’t think I’m confident enough to attempt to pull off an actual thong leotard like that, and also getting thigh highs to stay put is a pain in the ass so I thought I’d kill two (or three even?) birds with one stone and make the entire lower half of the costume a single piece. I started out by drafting some close fitting leggings with only one seam on the legs (on the inside) and then drafted a leotard pattern (I made the back fuller because I’m too shy to wear even a fake thong lol) and basically mushed them together in illustrator, sorta treating the legs like sleeves. My Illustrator patterns weren’t perfect and I ended up modifying them a lot once I got to attaching everything, but it ultimately worked out pretty well––so I had a bodysuit with the white leotard and some fake “skin” for the legs going down to about the knees.
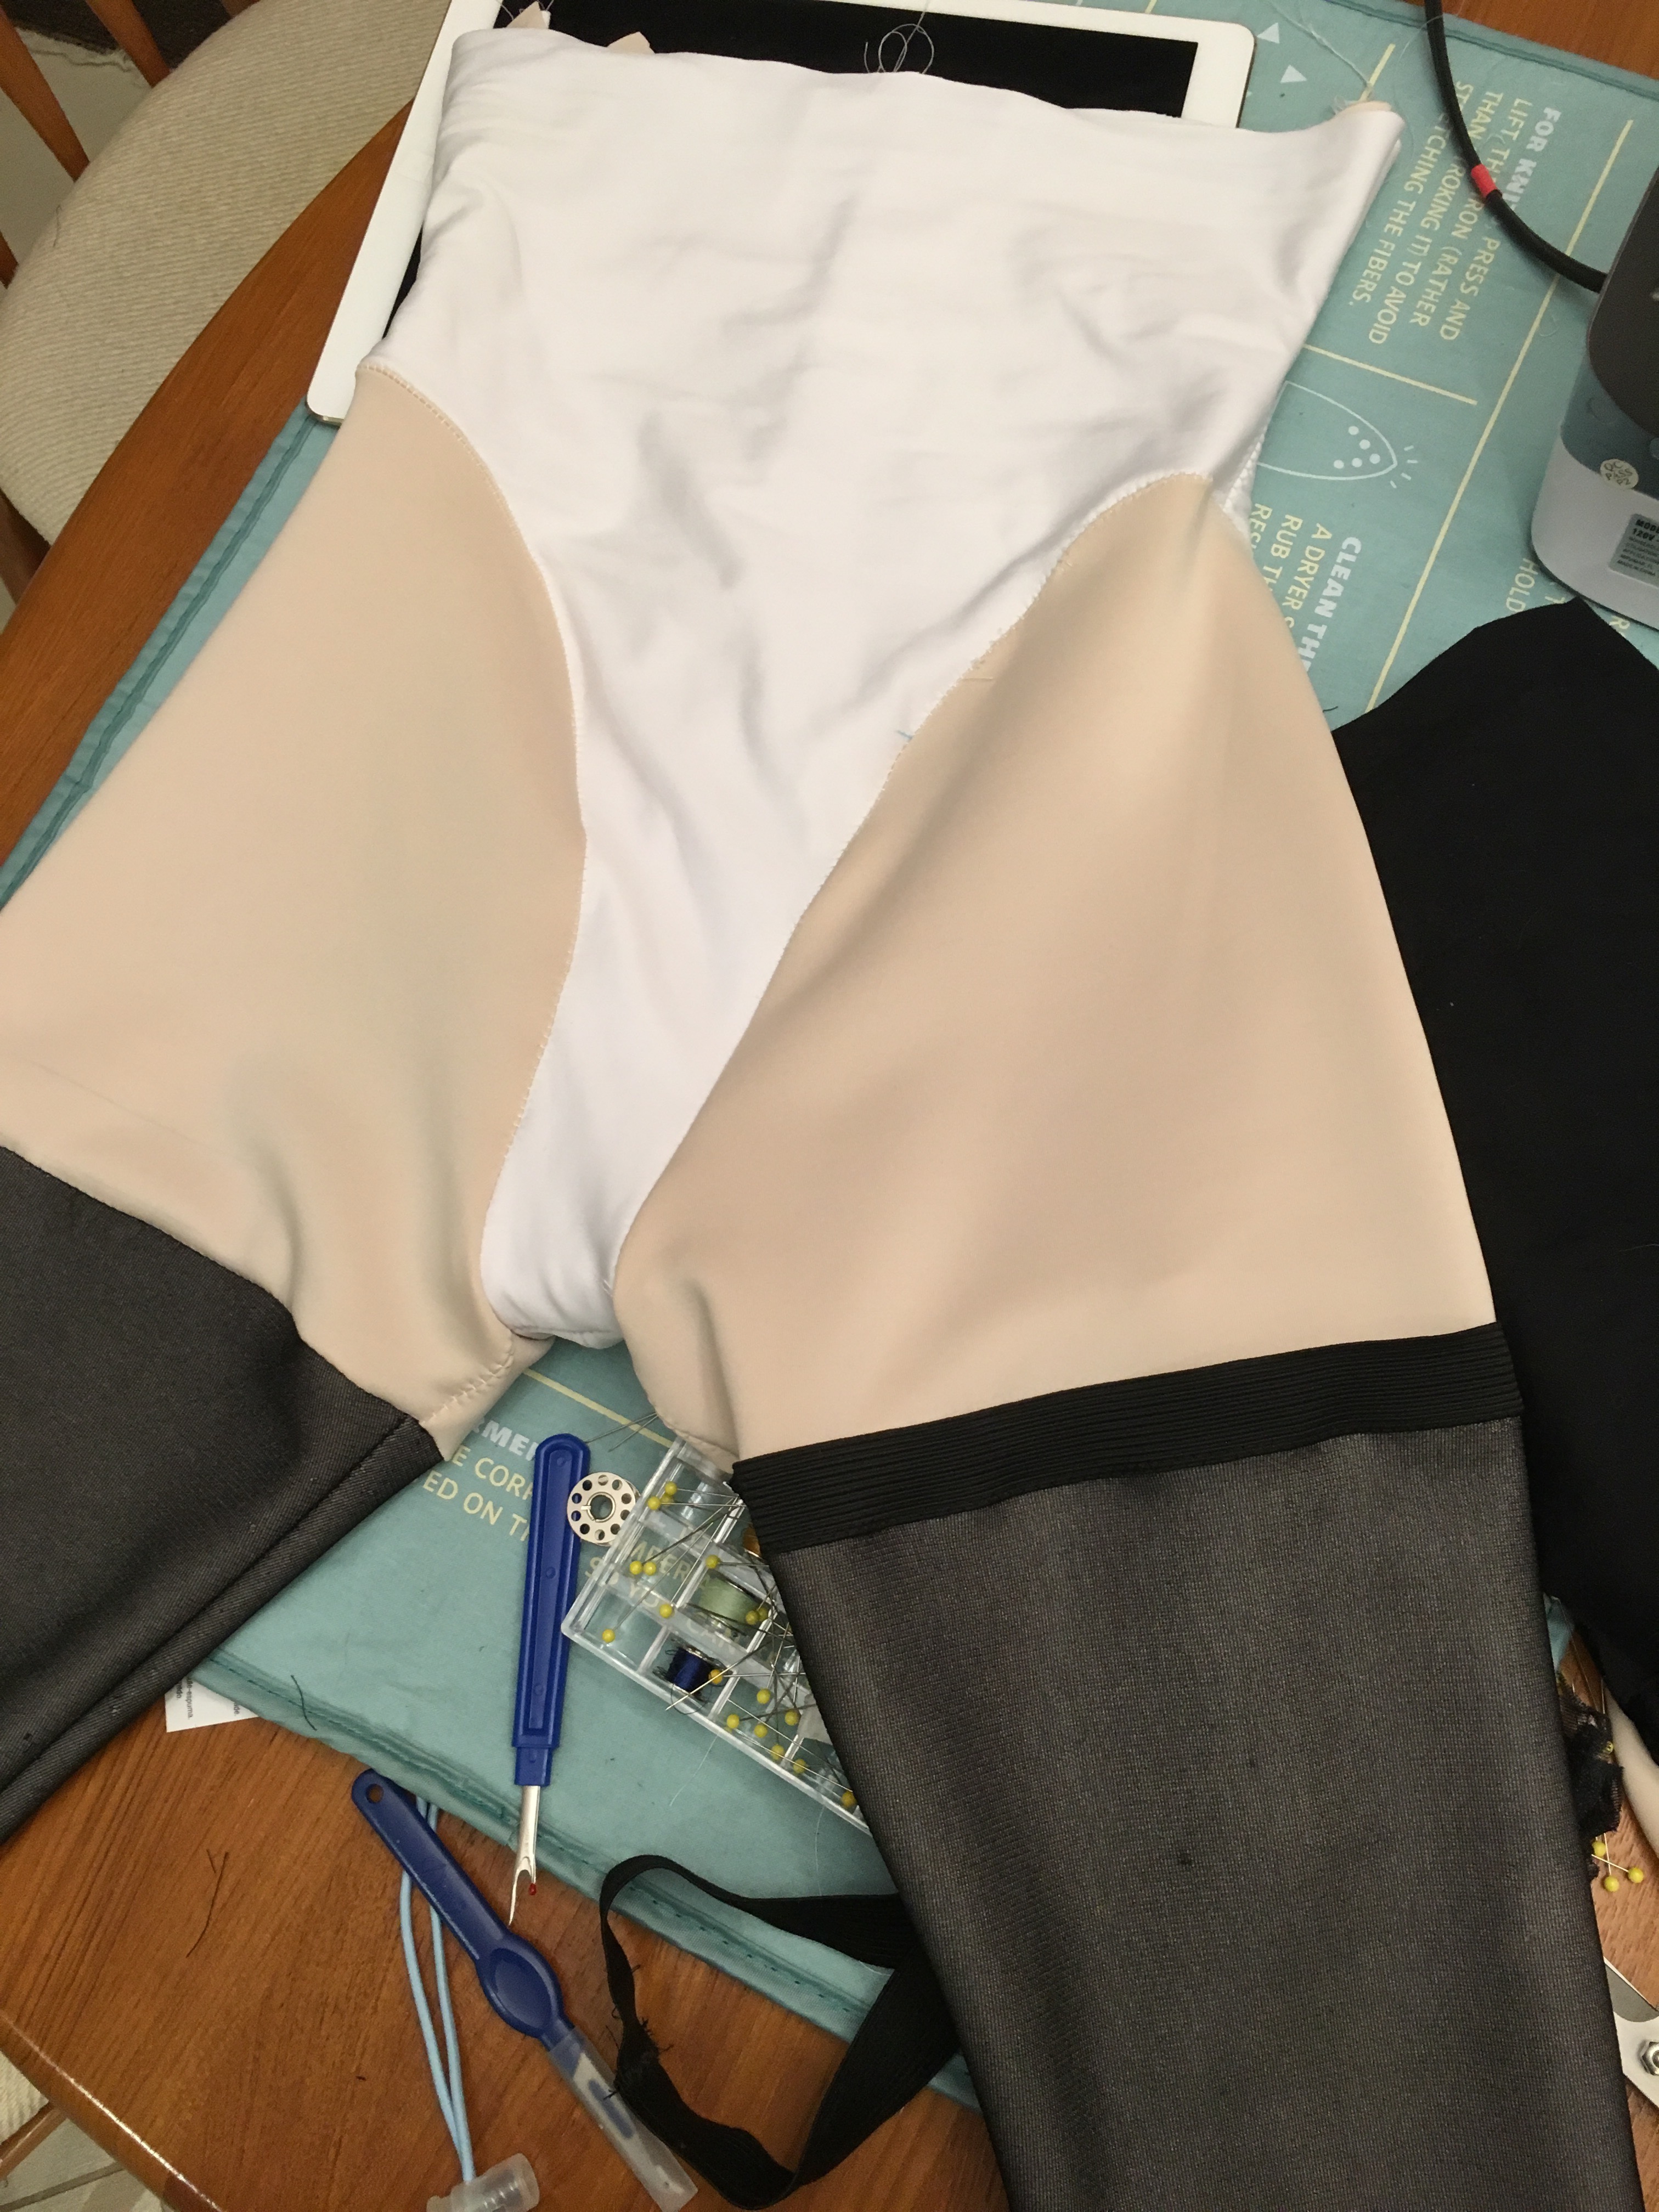
My next problem was what to do about the thigh highs. My first thought was to just buy some and stitch them onto the bodysuit I’d made, buuuut I kind of stupidly forgot how delicate tights are and had to look for some other solutions after I ruined the pair I attempted this with. I spent like 2hrs poking around my local Joann’s for black stretch mesh but couldn’t find shit (why???) but I found something else that ended up working possibly better even––black knit stretch interfacing! So basically I just hacked off the legs at the spot the thigh highs were supposed to hit, ironed the interfacing on and reattached them. It looks pretty convincing and they don’t move and don’t really run (you can tear the interfacing but it’s not going to make the whole thing fall apart at least). I should caution however that the stretch interfacing is only a 2 way stretch and (I mean it’s interfacing so this is probably obvious but) limits the amount of stretch to some degree. I ended up deciding to redo the legs at the last minute since they were a liiiittle too tight and had gotten too short (I never planned to make it a full length leg, just to the knees so the edges would be concealed in the boots). And when I redid it I moved the seam from the inner leg on the thigh high sections to the back to be even more “convincing” looking.

The last thing I did with the bodysuit was sew some ribbon ties on the inside of the top hem of my boots and some loops onto the bodysuit so I could tie the boots to the bodysuit so they wouldn’t fall down all the time. This also worked pretty well.
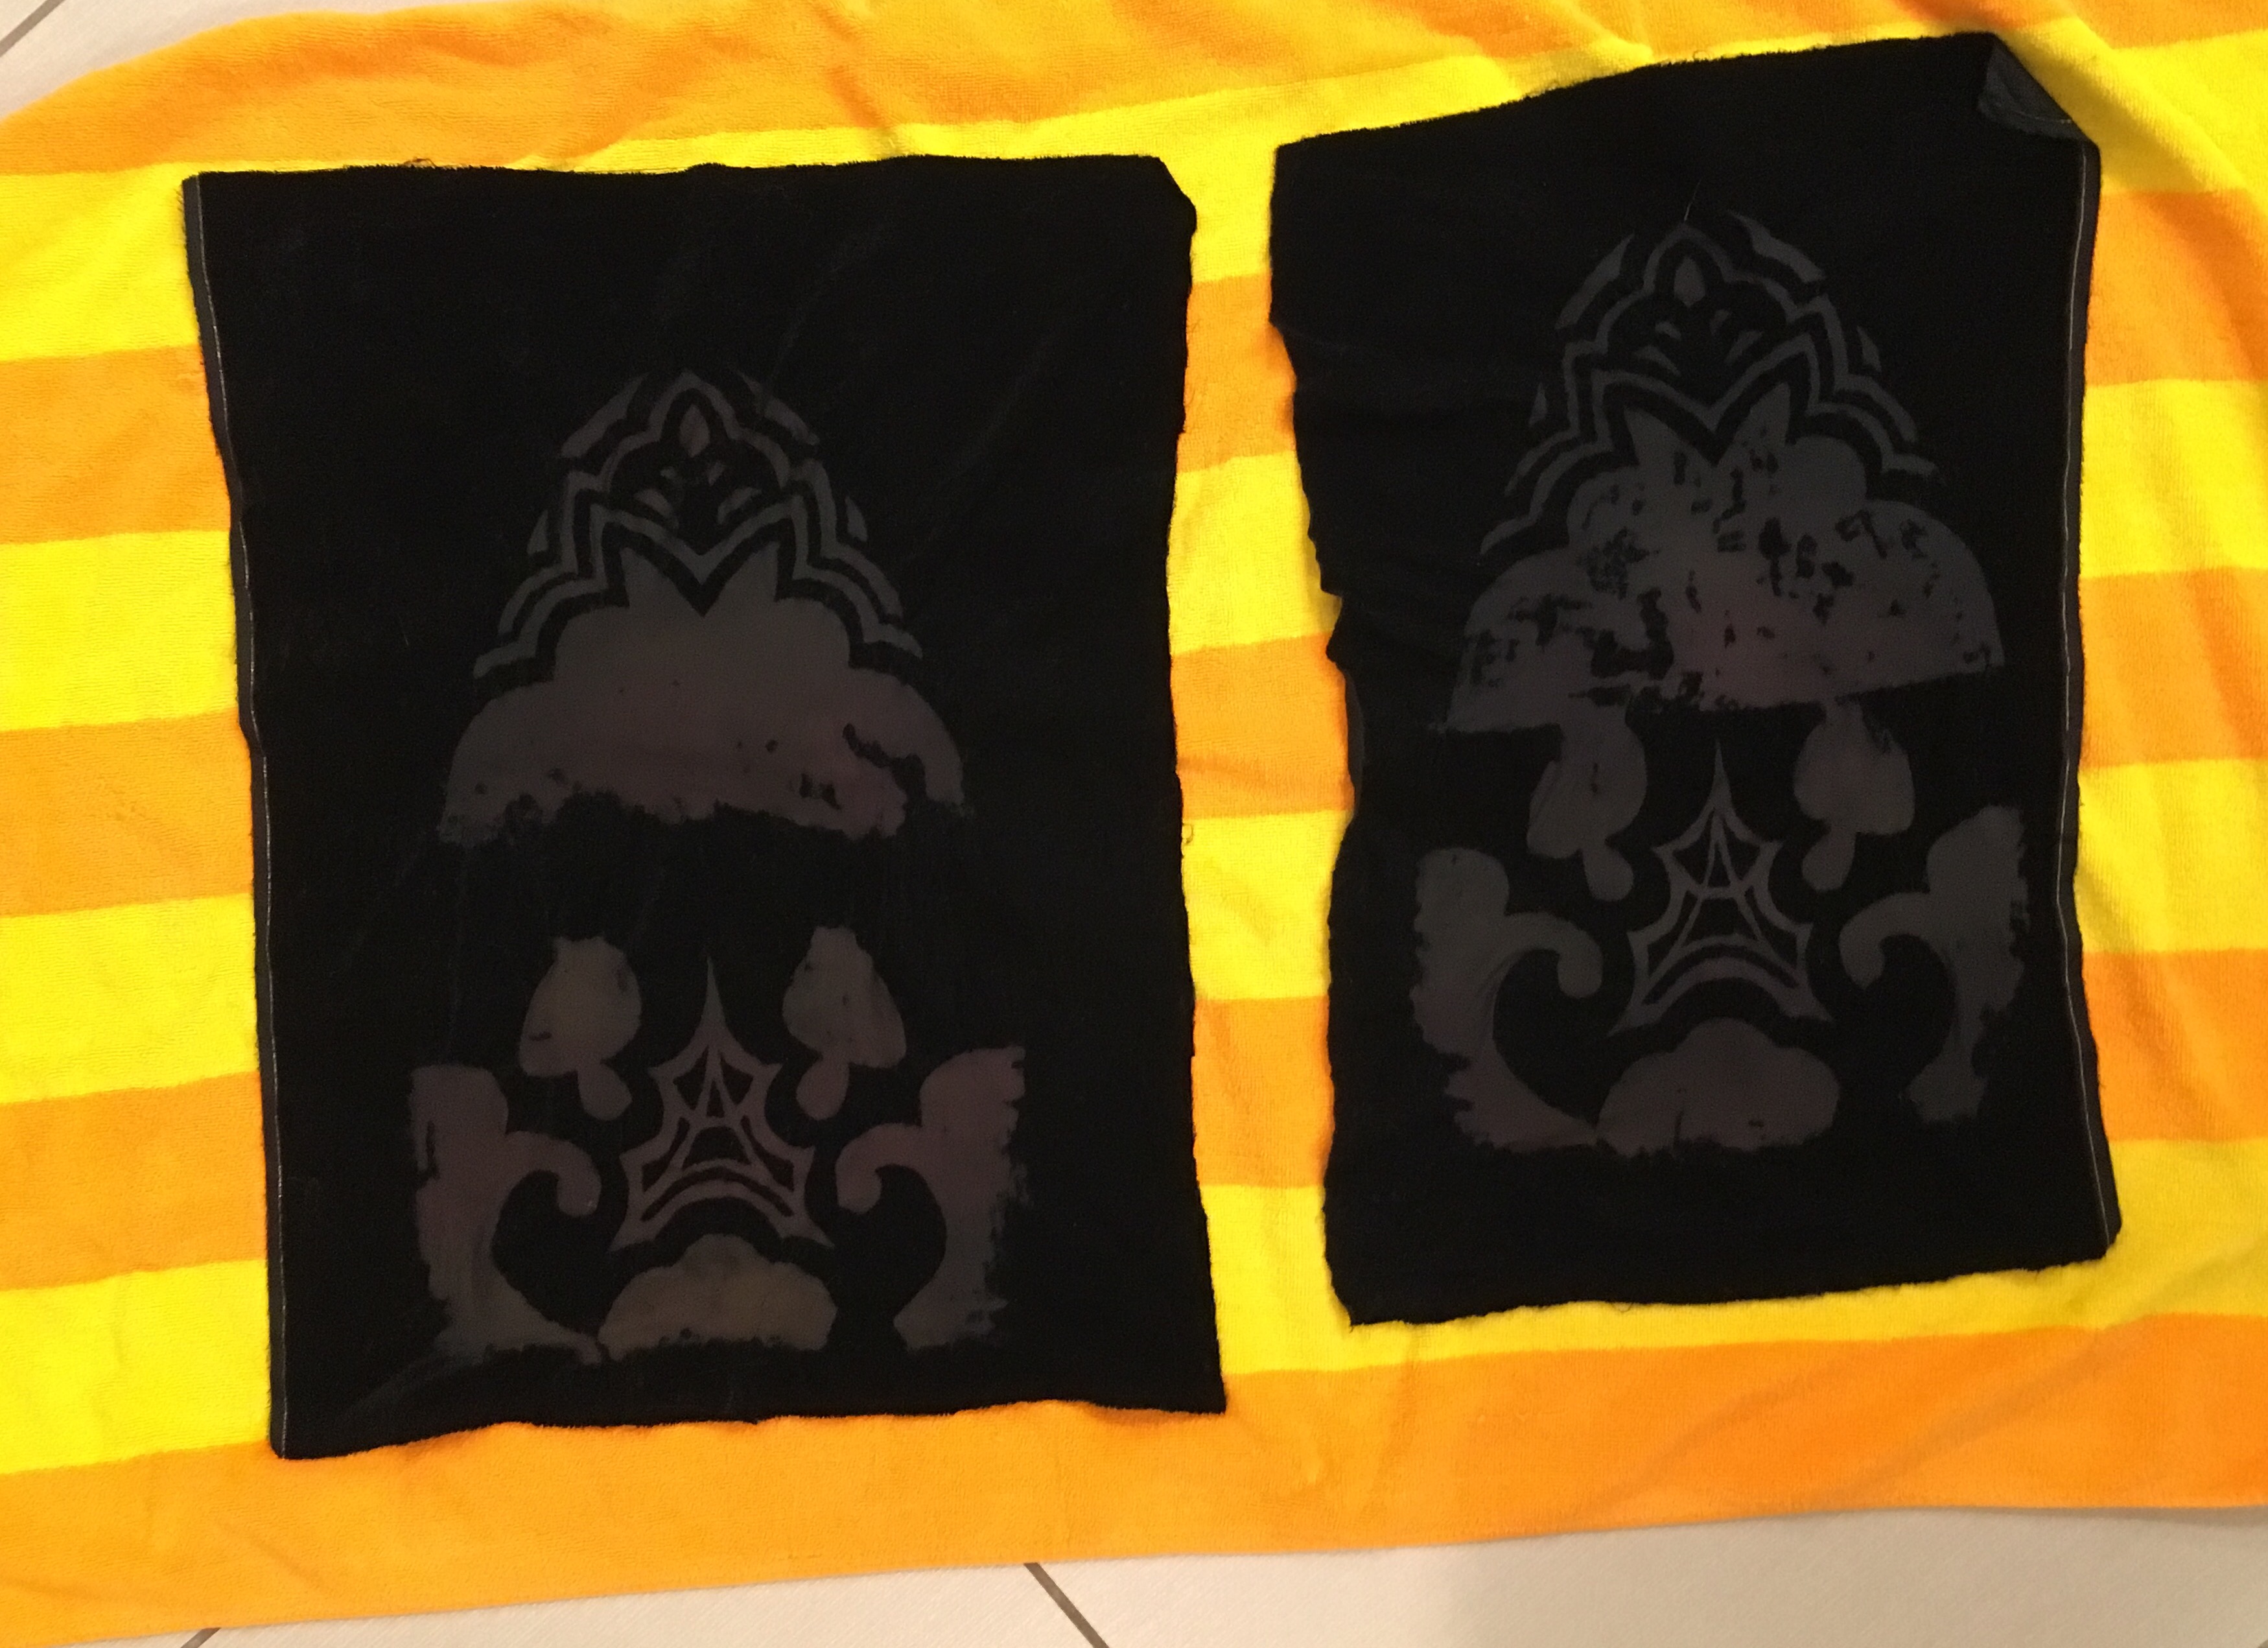
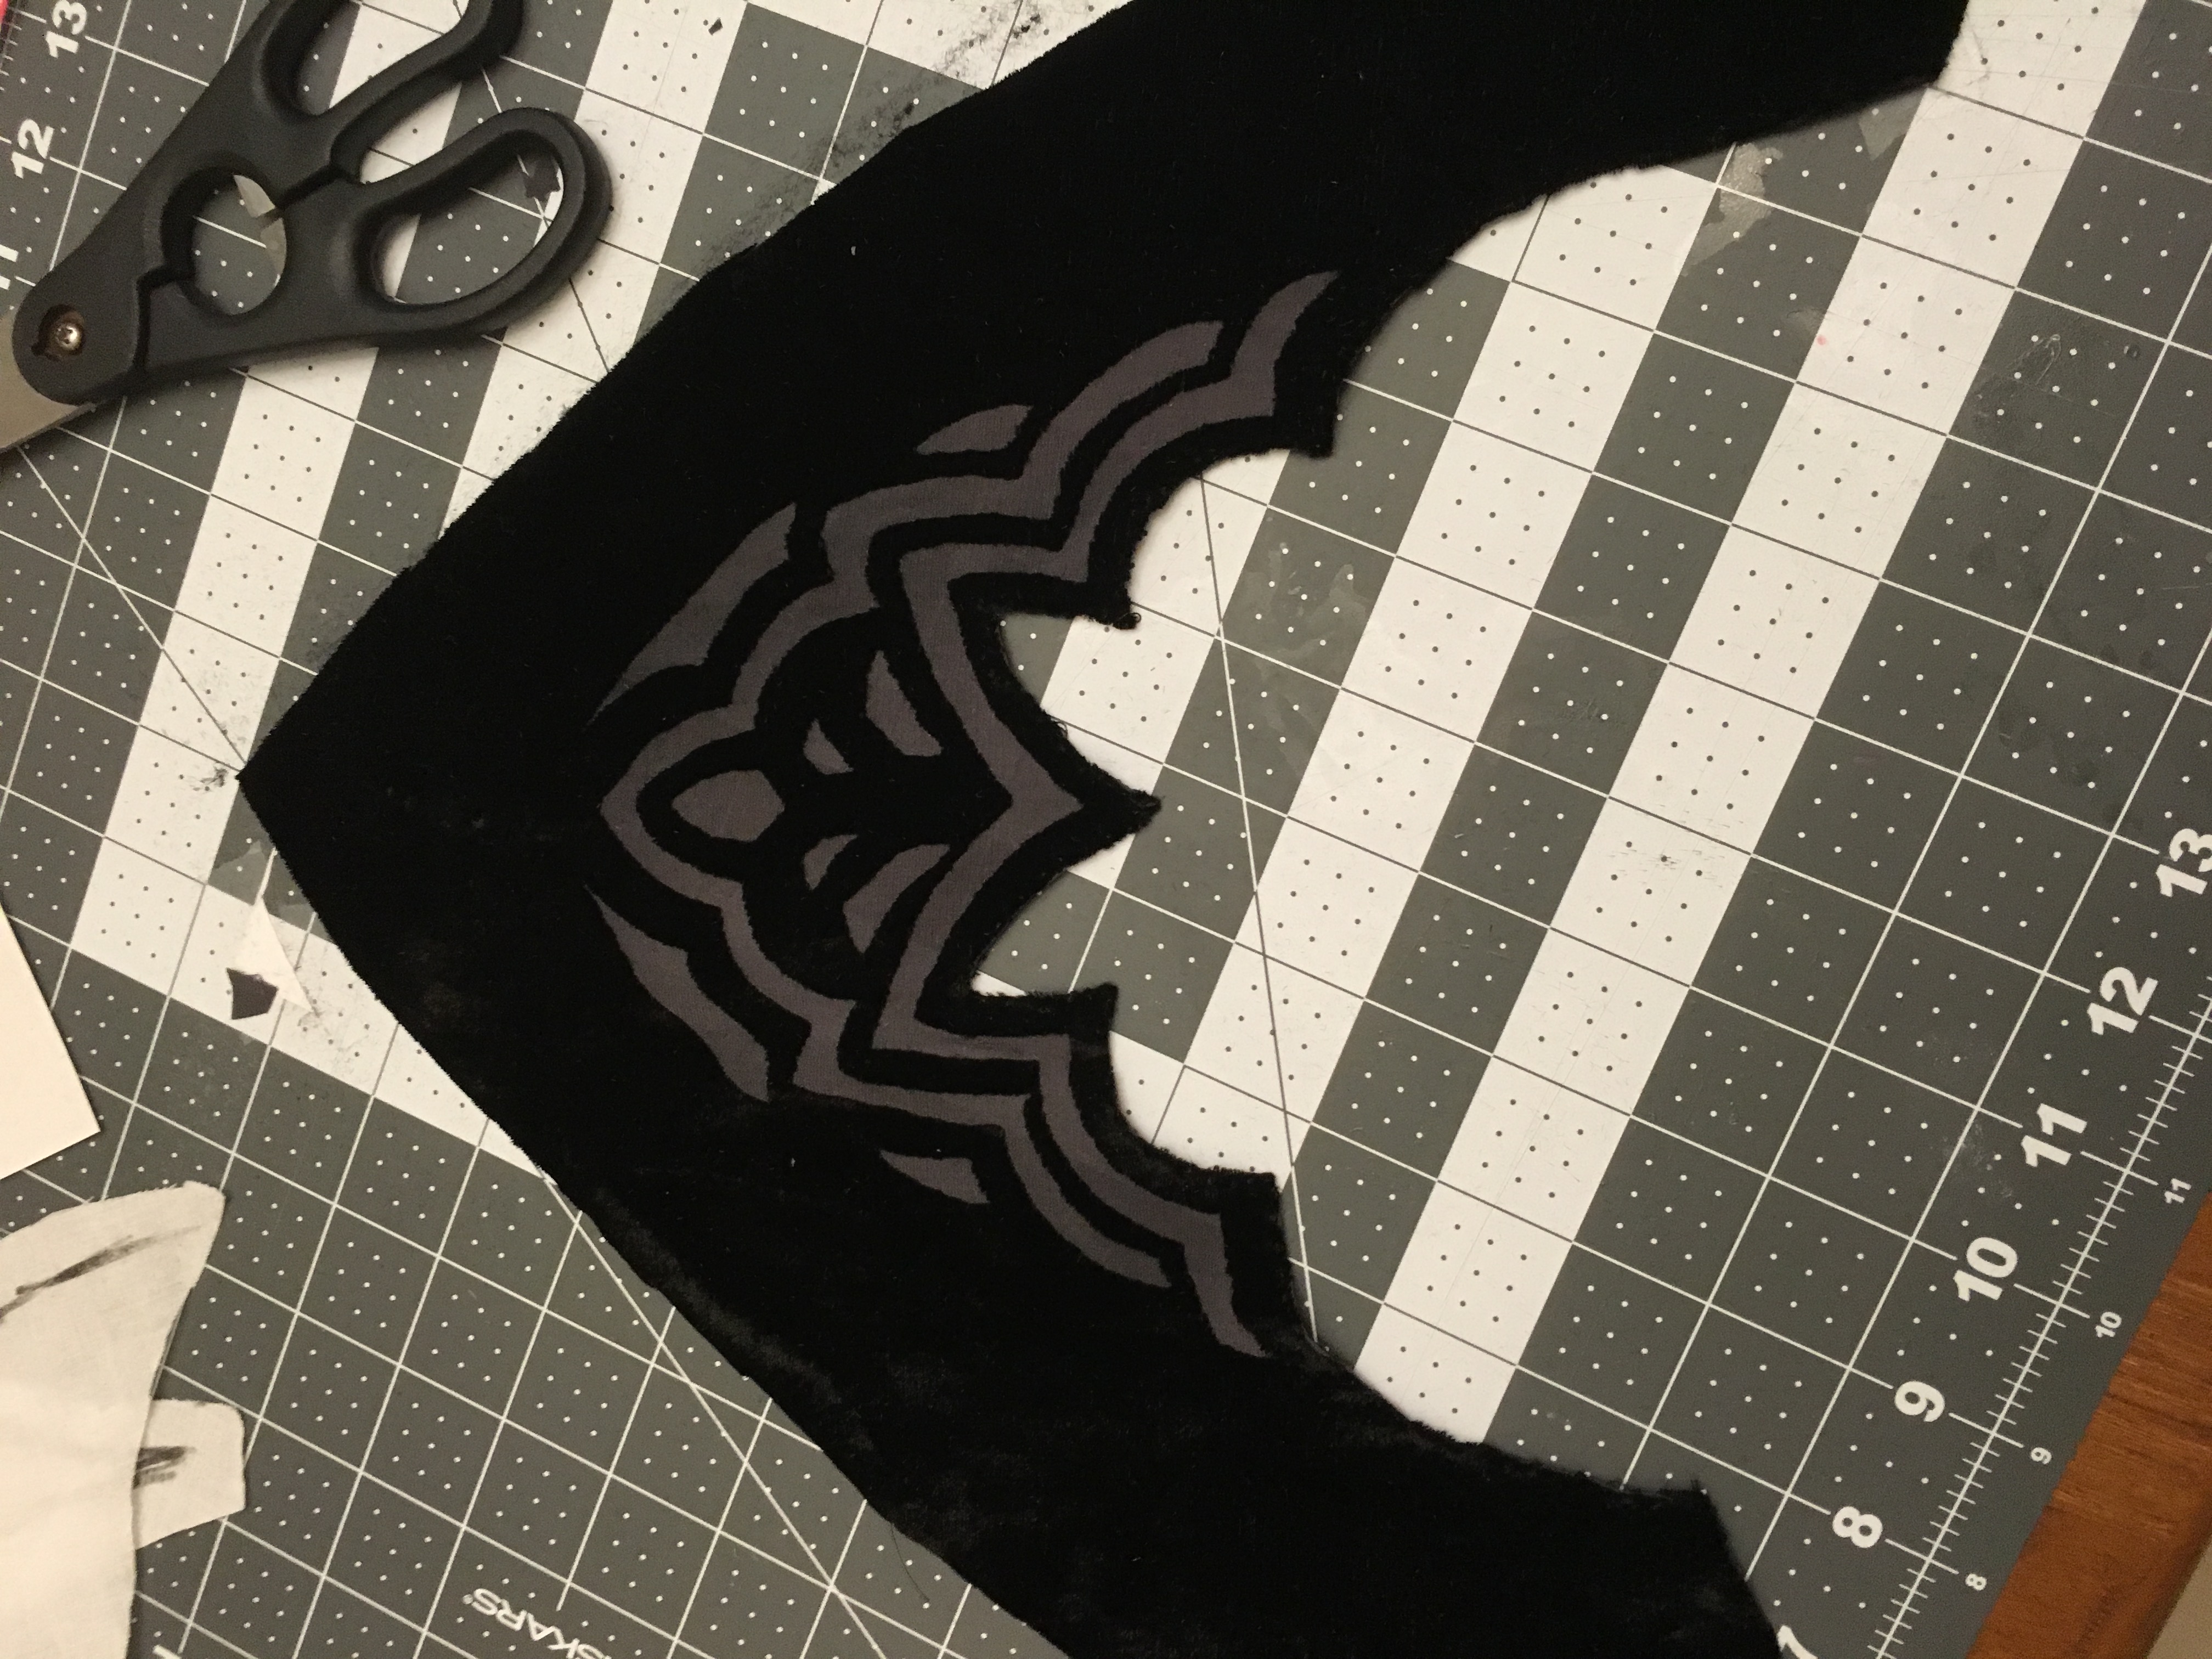
I guess the last truly “interesting” thing I did on this project was using the burnout technique to create the chest and back “lace” sections. The thought occurred to me when I realized the dress was velvet, it seemed like an obvious option (assuming it was doable at home). So after some research I found out it was viable and not that expensive so I gave it a shot. Basically how burnout works is you have a fabric made of two different types of fiber and you use a chemical to “burn” one of those fibers and not the other to create a pattern. I used Fiber Etch, which “burns” cellulose based fibers and leaves protein based fibers alone, and a silk/rayon stretch velvet (my thinking there was that the rest of the fabric was non-stretch so the chest and back would be good areas to add a little more mobility).
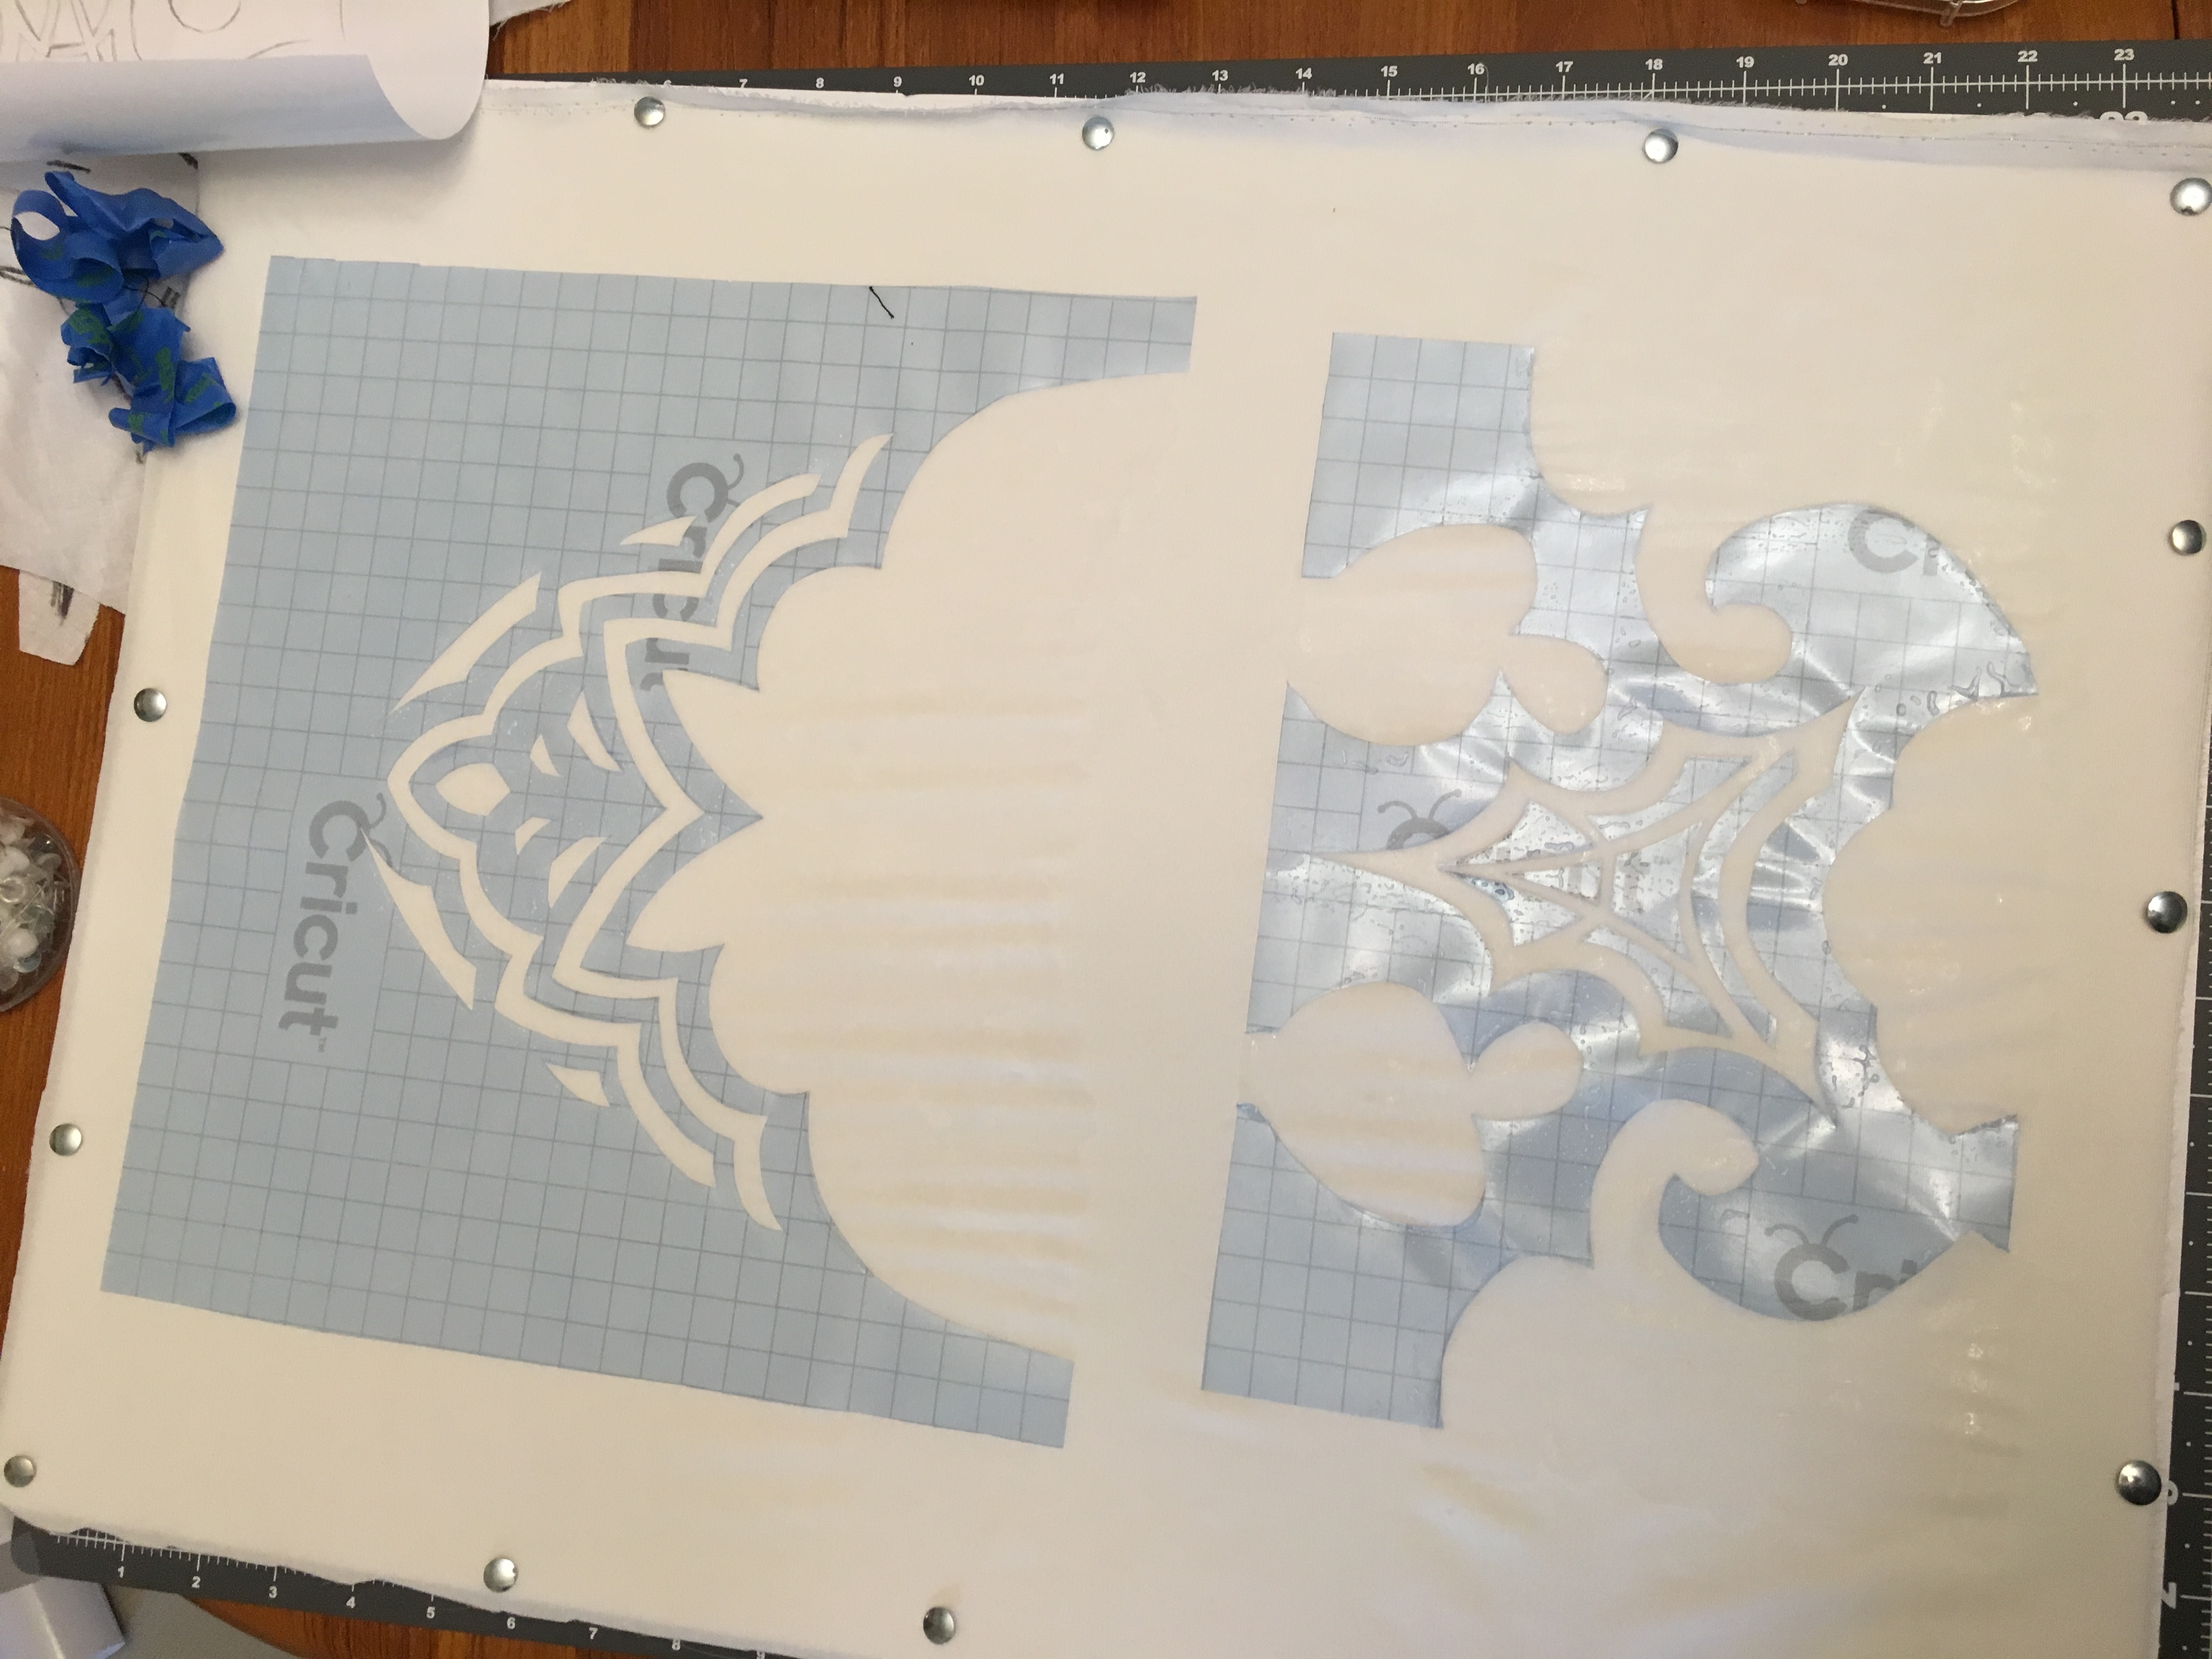
I used a white velvet instead of starting with black because the technique requires you to iron the fabric to actually “burn” the fibers out and you can tell when it’s done by the color changing (it turns brown), but you can’t really see that on black so I opted to start with white and dye it. I used some sticky stencil plastic stuff to cut the design out after I printed a template and then transferred the stencil to the back of the velvet and applied the Fiber Etch and so on.
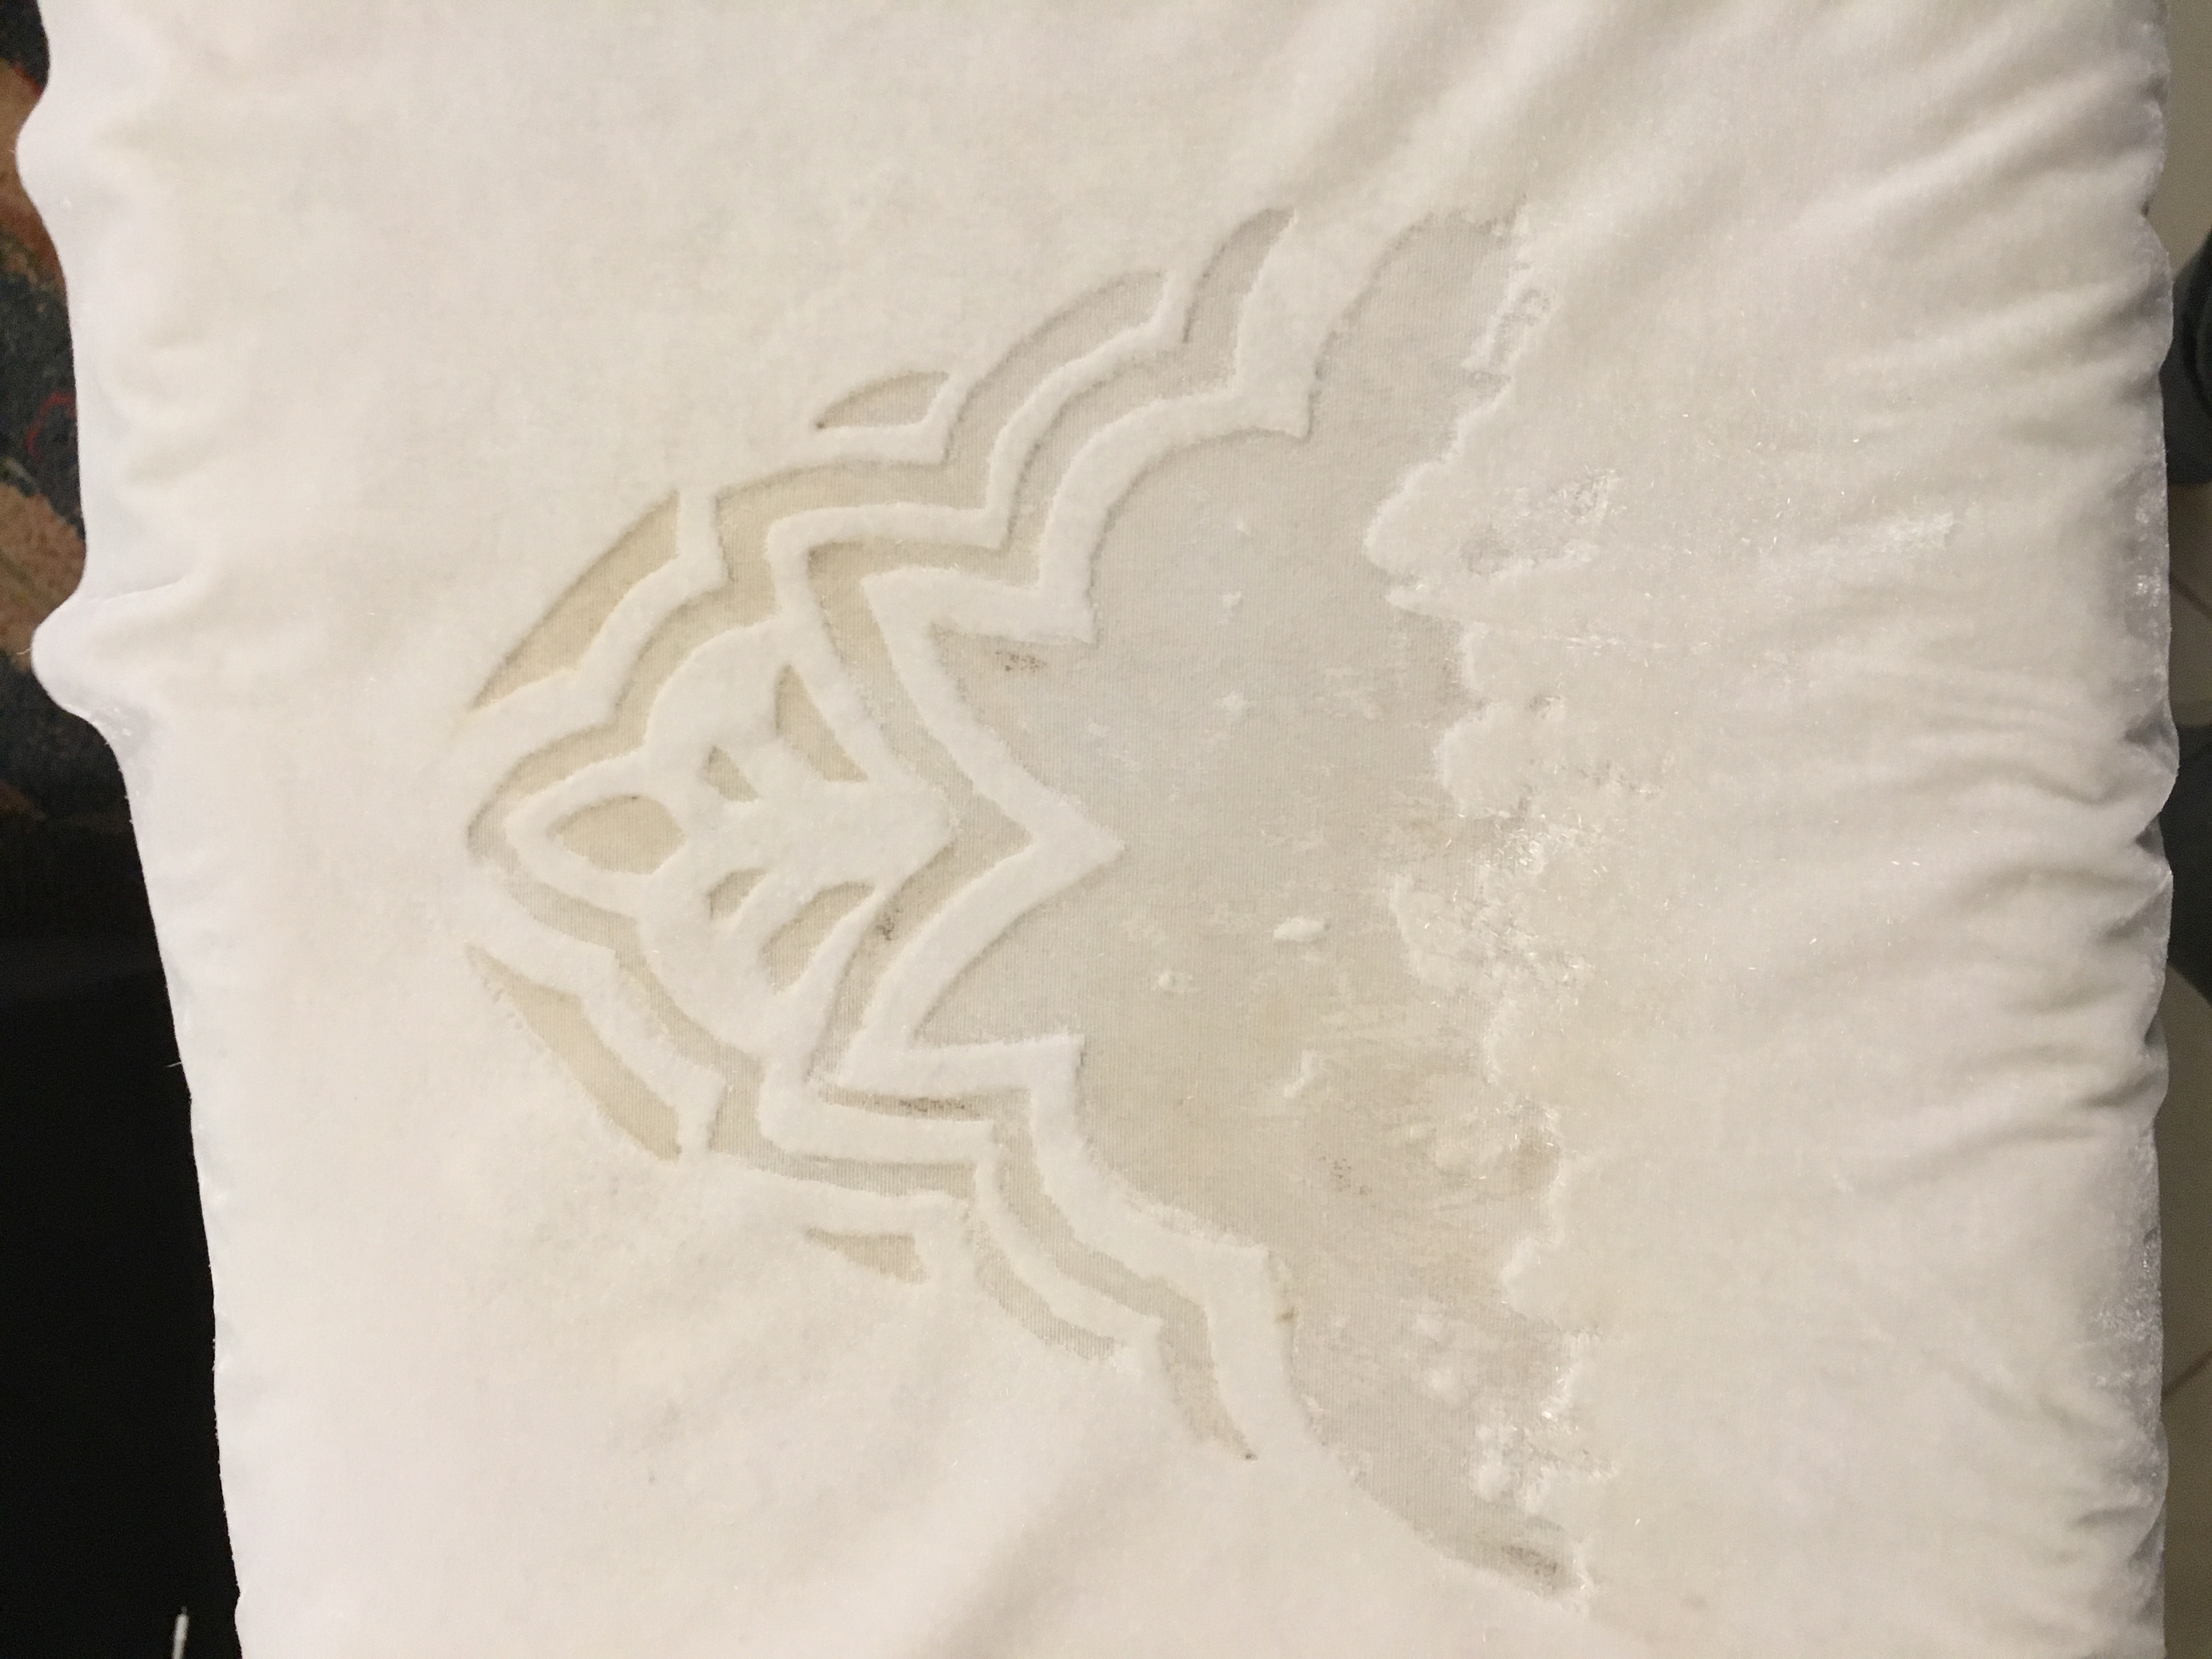

It worked pretty well, but I think I was either too impatient compared to when I did my small scale test or the final scale of the designs was just a little too small to get really clean edges with the fabric I was working with (a resolution issue so to speak w/ the weave of the fabric). I think it turned out alright, but it could’ve been better. Also the backing ended up not being very sheer in the end. So perhaps it’s not optimal (well at least not the specific fabric I used here) for this particular costume’s application but it’s definitely a viable cosplay technique and not even that expensive or difficult so I’m sort of surprised you don’t see it that often in cosplay.
I guess just as a few final notes, the skirt, while drafted to be a 3/4ths circle, ended up being closer to a 1/2 circle skirt after I adjusted the opening to make it fall straight in the front. I should have tested this more thoroughly before going to the final and shifted more of the skirt’s volume into the back panels. Pattern-wise I made it in three sections, two for the back and one for the front each 1/4th of the 3/4ths circle with a sort of trumpety(?) up top to make for a smooth transition into the skirt (I do not mean this as a dunk on anyone but imo putting a horizontal waist steam in on this one ruins the look of the outfit).

I used some intense horsehair braid, it’s 8″ wide. I also added a short layer of interlining to cover the horsehair on the velvet side too––I think this was overkill and probably just weighed the skirt down more than necessary. Fabric-wise I used black microvelvet (surprisingly forgiving!) and a nice linen for the lining and for the embroidery (well, what little of it I completed) I stole an idea I saw someone use on /cgl/ and used soutache cable. It looks great and is certainly faster than a satin stitch but it still takes for fucking ever (hence my failure to complete it + not being able to hoop the velvet makes it so much slower).
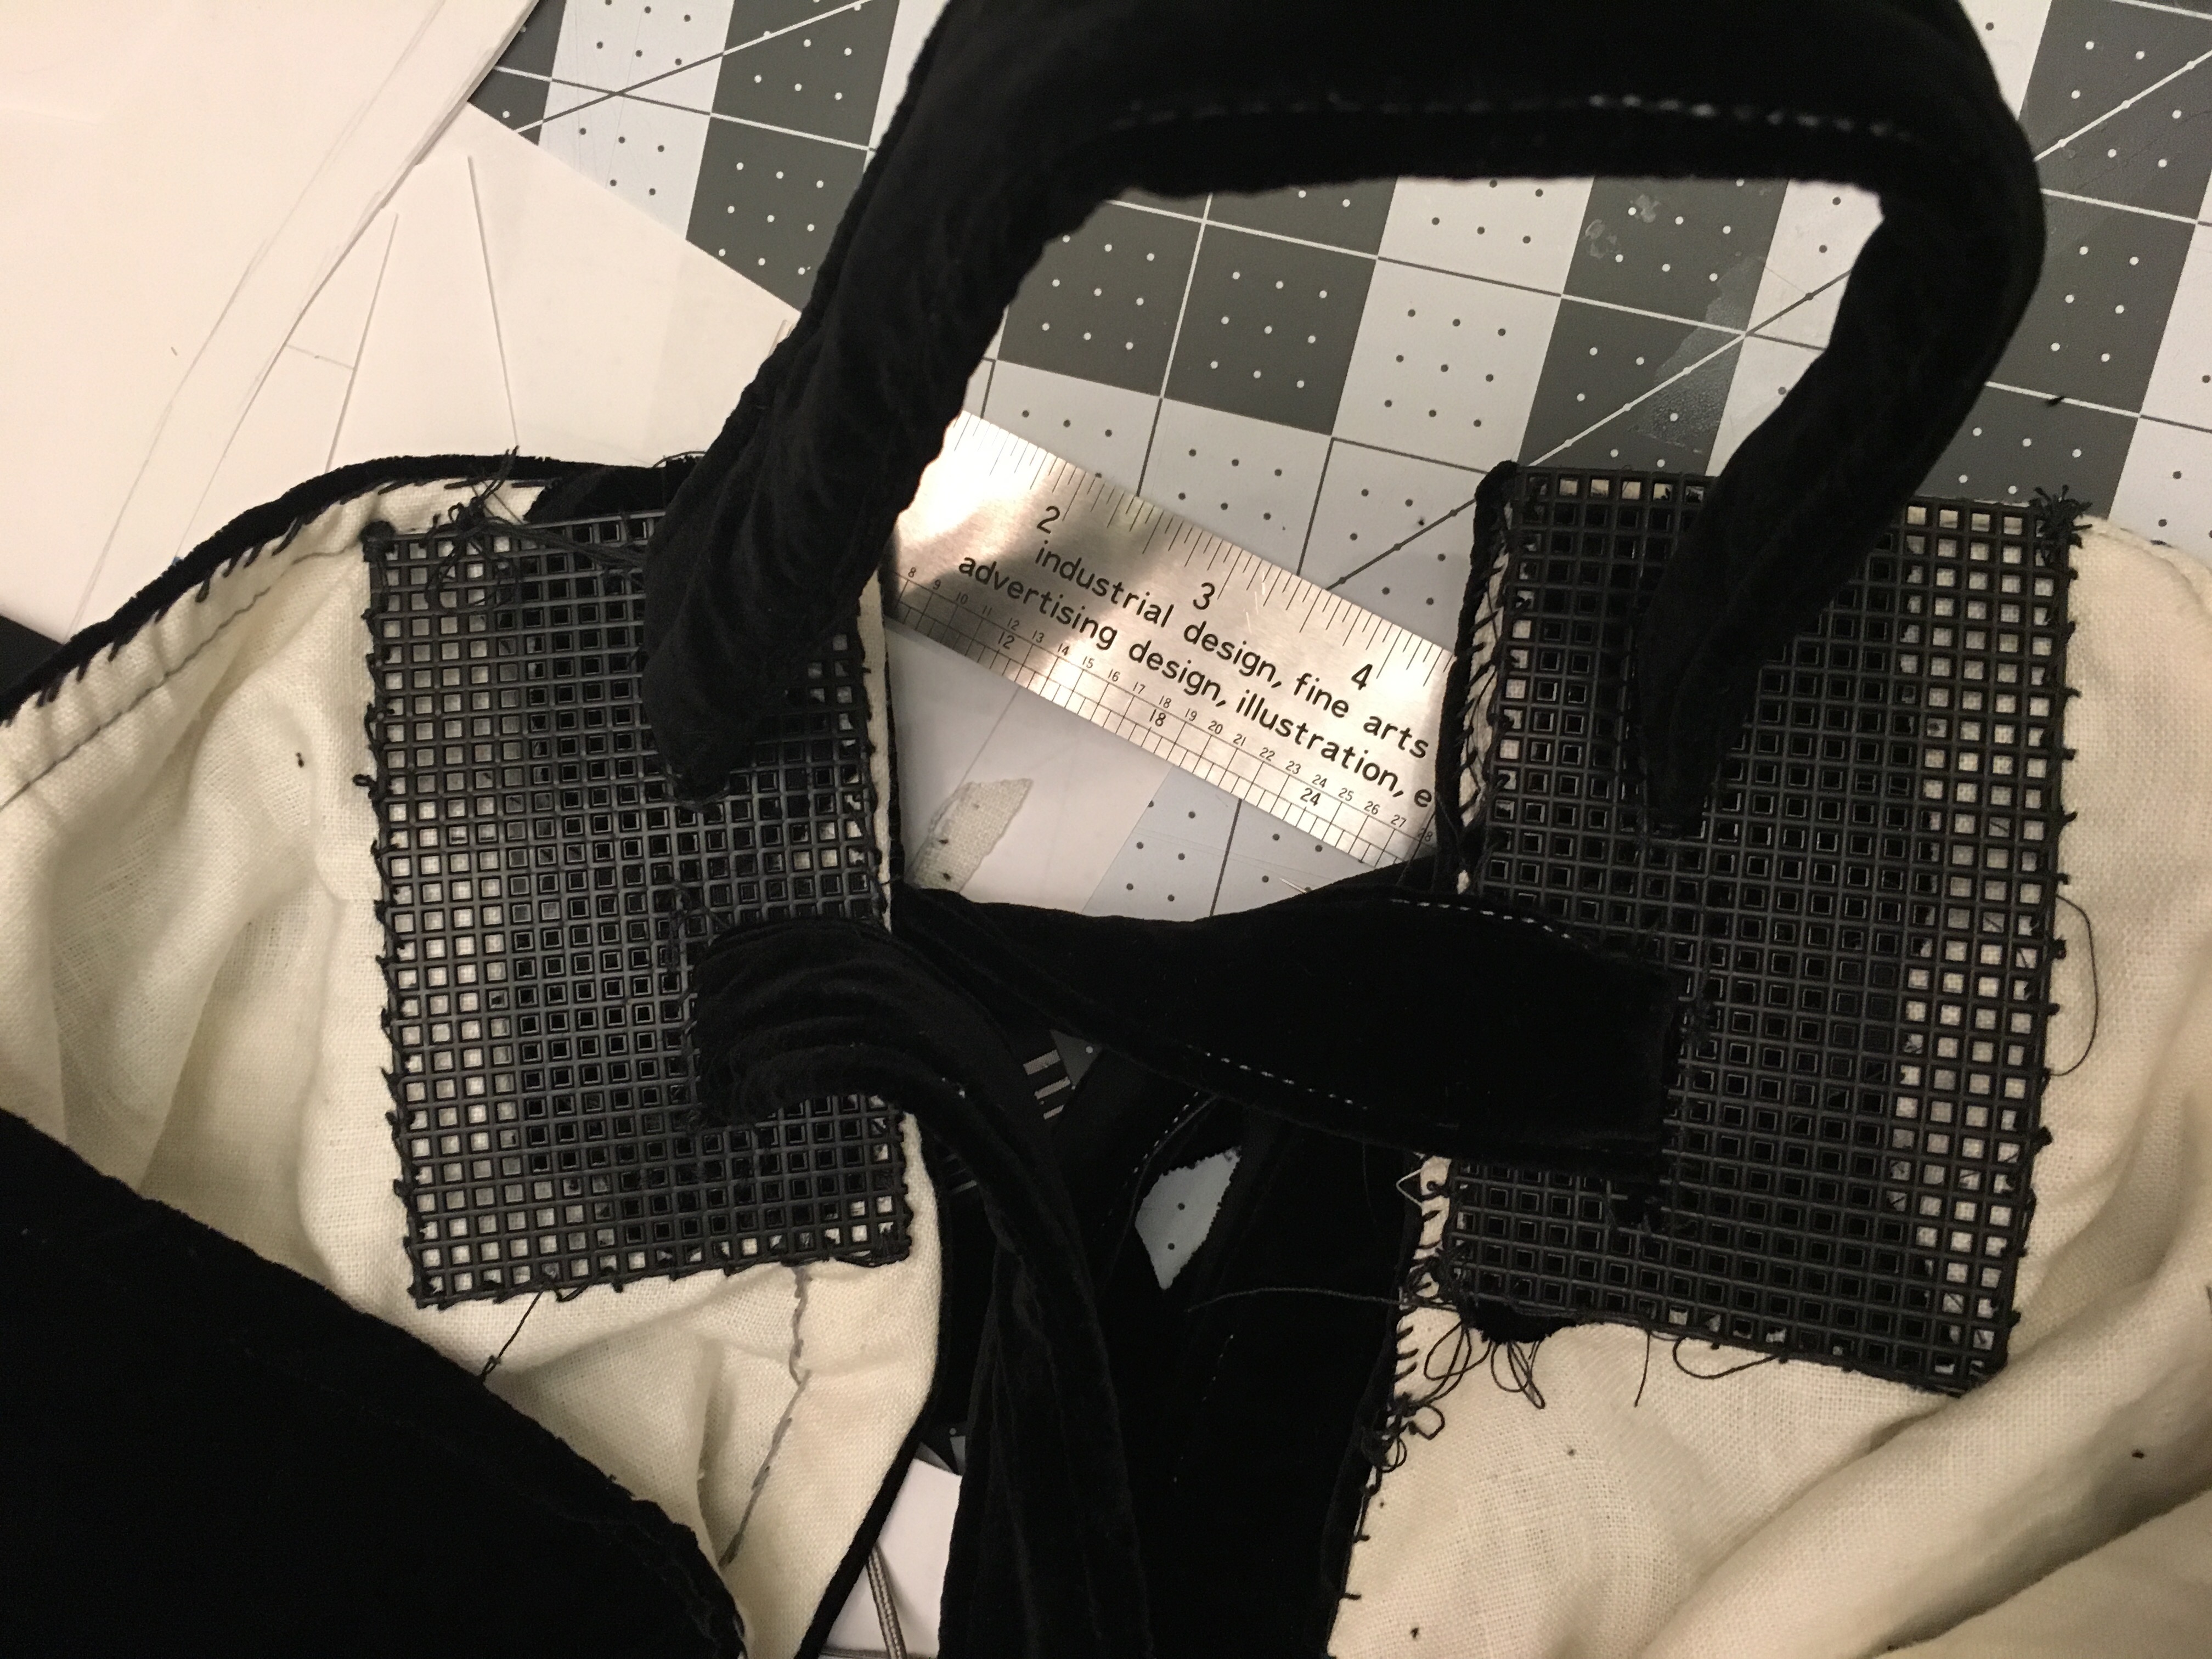
I was also dumb and thought “hey you know what would be cool? if I made the skirt’s closure just the way it is in the game” rather than making it attached to the bodice with a fake closure and a zipper in the back (I had a center back seam in the skirt anyway! Why was I such an idiot? lol). It worked pretty well at first but wearing it around for a while I ended up futzing around with the damn thing so much it was not worth it. That said, I did discover that a nice cheat for heavy-duty stabilizing is that plastic mesh stuff. Gave me the stiffness I needed to support the holes for the ties without warping the skirt while remaining flexible enough to conform to my body. It’ not the most elegant looking solution but it absolutely works.
I can’t remember what else I was going to mention now, but I hope someone finds any of this remotely useful or just interesting. If you’d like to know any more about the materials or techniques I used, I’d be happy to direct you to the places I got them from or point you at tutorials I used (I’d just add them in this post right now but I’m too lazy unless someone actually wants to know).